How to Make a Website for Kids

If your child has ever asked you, “Can I make my own website?” — take a deep breath. The answer is yes, and no, you don’t need a degree in computer science to help them do it. In a world where kids are born with tablets in their hands and TikTok in their DNA, knowing how to make a website for kids isn’t just a fun summer activity — it’s a valuable skill that blends creativity, critical thinking, and digital literacy. Whether it’s a blog about dinosaurs, a lemonade stand e-commerce site, or a virtual art gallery, building a website can be both educational and wildly exciting (even for parents trying not to panic over domain names). Let’s walk through how to make a website for kids, step-by-step — no coding meltdown required. Why Should Kids Learn Website Creation? Because let’s face it — if they can navigate YouTube’s algorithm better than you can find your TV remote, they’re ready for more. And let’s not forget the bragging rights: “I have a website” beats “I have 10 Roblox skins” any day. Start with a Plan (Even If It’s Drawn in Crayon) The first step in how to make a website for kids is figuring out what they want to build. Is it: Have your child sketch ideas, pick a name, and talk through what kind of content they’ll want to share. Keep it open-ended, and let their imagination lead the way. Pick the Right Website Builder (Kid-Approved and Parent-Safe) Not all website builders are created equal — especially when it comes to children. Here are a few standout platforms: Look for platforms with no-code features, free hosting, and built-in privacy protections. Also, avoid anything that asks for a credit card before your morning coffee. Choose a Template and Let the Fun Begin This is where things get colorful — literally. Templates are pre-designed website layouts that your child can customize. Encourage them to pick one that reflects their project’s personality, whether it’s: Bonus tip: Let them make a few “bad” design choices at first. That neon pink text on a yellow background? A design lesson in disguise. Add Content That Tells Their Story Now comes the heart of the site — the content. Here’s what your child can include: It’s also a great time to introduce kids to the idea of digital responsibility — no addresses, phone numbers, or mysterious usernames that sound like a Marvel villain. Safety First, Always Knowing how to make a website for kids is only part of the picture. Teaching safe publishing practices is equally important. Things to check: Tools like Wix’s 24/7 security monitoring or Appy Pie’s no-code privacy layers are perfect for making sure the website adventure doesn’t lead to a cybersecurity horror story. Hit Publish – Then Celebrate with Ice Cream Once your child is happy with their design, content, and safety settings — it’s time to go live! Publishing is the ultimate “ta-da” moment. Encourage your child to share the site with friends and family (and maybe grandma, who still thinks “the Google” is one website). Remind them: websites are never final. Updates and improvements can be made anytime. It’s not just a lesson in tech — it’s a life lesson in iteration and resilience. Using a Website to Encourage Creativity Long-Term Kids’ websites can evolve as they grow. Here’s how to keep the creativity flowing: Not only does this sustain their interest — it nurtures lifelong curiosity. Wrapping Up: It’s Easier (and More Rewarding) Than You Think Learning how to make a website for kids is more than just a tech skill — it’s a launchpad for expression, learning, and building confidence. Whether it’s a playful homepage or a full-fledged digital business card, your child will walk away knowing they’ve created something all their own. And hey — if you’re a parent or teacher wondering how to help a child start their digital journey, you’re not alone. As a digital marketing company in Chandigarh, we help clients of all ages build user-friendly, secure, and SEO-ready websites — including platforms for kids with big dreams and bright ideas. Let us help bring your little creator’s vision to life, one pixel at a time.
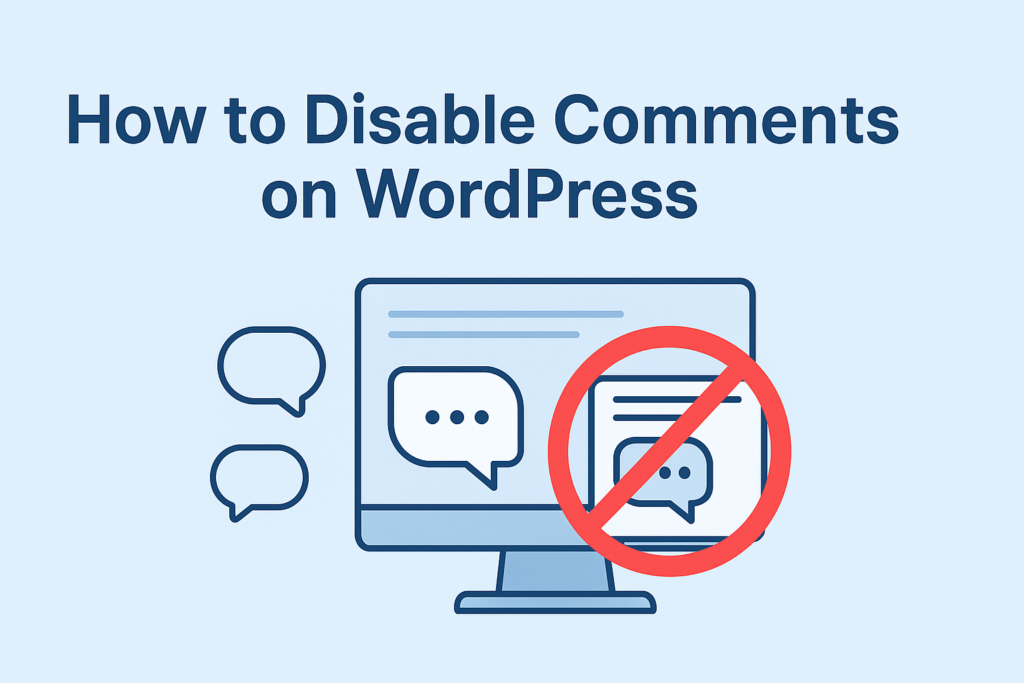
How to Disable Comments on WordPress
Comments on a WordPress site can be a double-edged sword. On one side, they help foster community engagement, but on the other, they can become a digital wild west of spam, shady links, and unmoderated chaos. If your site’s comment section feels more like a bot party than a conversation, it might be time to pull the plug. So, how to disable comments on WordPress without turning your dashboard into a maze of settings? You’re in luck. Whether you’re running a clean-cut business site or an eCommerce store that doesn’t need customer reviews under every post, this guide walks you through 7 foolproof methods—plus a few bonus tips. Let’s dive in. Why Disable Comments on WordPress? Before we get to the “how,” let’s tackle the “why.” Spam is the most obvious villain. Unless you love seeing comments like “Amazing blog! Check my crypto site,” you’re better off disabling them. Not only do these spammy messages damage your SEO, but they also affect your credibility. Then there’s the security angle. Malicious links in comments can trick visitors and open your site to vulnerabilities. For many, it’s safer to just close the door entirely. Also, if you’re running an online shop, comments might just distract from your goal: converting visitors into buyers. Nobody needs a product page turned group chat. Finally, if you already have a community on a forum or social platform, your WordPress comment box might just be an unnecessary duplicate. 1. Disable Comments on All Existing Posts and Pages Let’s start with the nuclear option. To wipe comments across your entire site: Next, go to Posts > All Posts, use Bulk Edit, and under Comments, choose Do not allow. Do the same for Pages under Pages > All Pages. Want a faster trick? Head to Settings > Discussion, and under “Other comment settings,” set Automatically close comments on posts older than 0 days. Boom—no more future comments. Pro Tip: Pages in WordPress usually have comments disabled by default. So if you find one with comments, you’re either lucky or once went plugin-happy. 2. Disable Comments on Future Posts This is like pre-committing to silence. Now every new post you create will be blissfully quiet. If only email chains worked the same way. 3. Disable Comments on Specific Posts or Pages Let’s say you want feedback on your blog posts but not on your Terms & Conditions page (because, honestly, nobody reads it). To do that: Done. Selective silence—like muting that one uncle in the family group chat. 4. Disable Comments on an Individual Post or Page If you’re more of a hands-on type: No more comments for that one page. Great for announcement posts, one-off content, or anything where feedback is just not necessary. 5. Disable Comments on Media Attachments Fun fact: WordPress generates pages for your media files (images, videos, etc.)—and yes, they can have comments too. To stop that: If you’ve got hundreds of media files, don’t panic. Just add this snippet to your functions.php file or use the WPCode plugin to do it safely: function disable_media_comment( $open, $post_id ) {$post = get_post( $post_id );if( $post->post_type == ‘attachment’ ) {return false;}return $open;}add_filter( ‘comments_open’, ‘disable_media_comment’, 10 , 2 ); Don’t forget to backup your site before adding any code. Trust us—Ctrl+Z doesn’t work in PHP. 6. Use a Plugin to Disable Comments For those who prefer the “one-click and chill” approach, the Disable Comments plugin is your best friend. Fast, clean, and no manual tinkering required. It even removes comment options from the admin menu and toolbar. Heads up: if you go with this plugin, individual post comment settings won’t override it. It’s all or nothing. 7. Disable Comments via Custom Code Calling all developers! If you want full control, add this code to your functions.php file: add_filter(‘comments_open’, ‘__return_false’, 20, 2);add_filter(‘pings_open’, ‘__return_false’, 20, 2);add_filter(‘comments_array’, ‘__return_empty_array’, 10, 2); You can also remove comment links from the dashboard and toolbar with some additional tweaks. Again, use a child theme and backup everything—your future self will thank you. Bonus: Clean Up the Leftovers Even after disabling comments, some themes still show a “Comments are closed” message. Tacky, right? Here’s the fix: No more awkward leftovers. Your site is now officially comment-free. Final Thoughts Figuring out how to disable comments on WordPress doesn’t have to feel like coding the next Mars rover. Whether you choose plugins, settings, or custom code, you now have the tools to reclaim control over your content and keep things professional. Remember: disabling comments isn’t about shutting out your audience—it’s about choosing the right space for engagement. Maybe that’s your social media, maybe a dedicated forum, or maybe just a well-crafted contact page. 👋 Need Help? We’re a Digital Marketing Company in Chandigarh. If tweaking settings or editing PHP files makes you nervous, let us take over. As a trusted digital marketing company in Chandigarh, we help businesses like yours manage and optimize WordPress sites—minus the stress. From security to speed to making sure your blog doesn’t turn into a spam battlefield, we’ve got you covered. Because a silent website should still speak volumes.
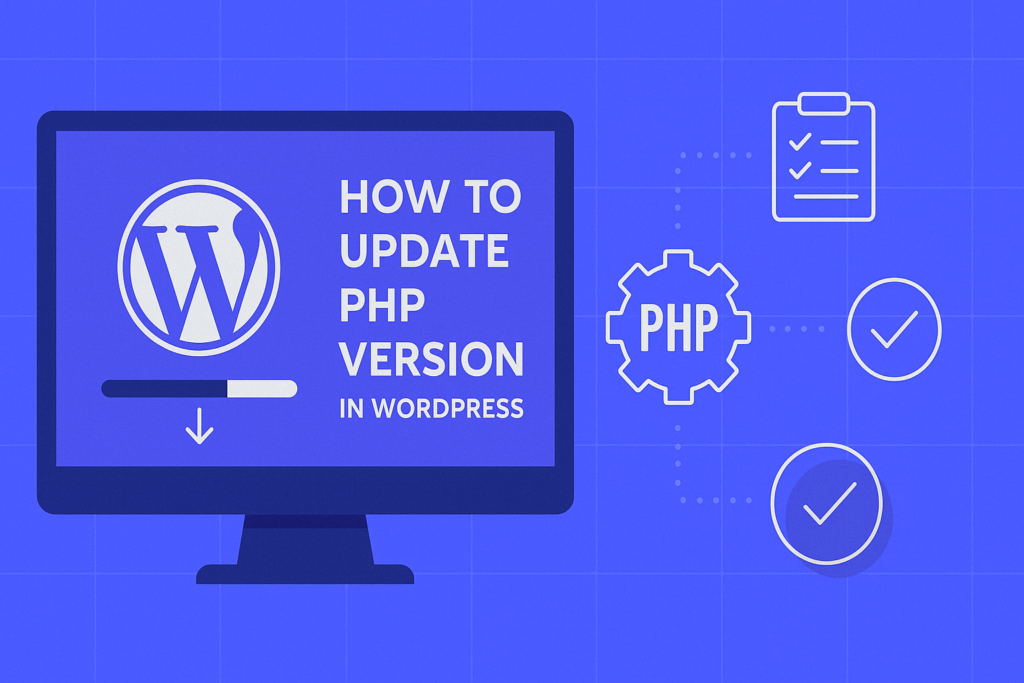
How to Update PHP Version in WordPress
In the world of websites, speed and security are no longer a luxury—they’re your first impression. And one of the most overlooked upgrades that can instantly boost both is updating your PHP version. If that sounds a bit too technical, don’t worry. We’re going to break it down in plain English, and yes, we’ll even make it a little fun (as fun as PHP can be). By the end of this guide, you’ll know how to update PHP version in WordPress without breaking anything—and hopefully without breaking a sweat. Why You Should Care About PHP Updates Let’s get this out of the way—PHP is not just another tech acronym. It’s the scripting language behind WordPress. In other words, your website breathes PHP. But just like your smartphone software, PHP needs updates to stay sharp. Here’s what you get with a PHP upgrade: So, if you’ve been ignoring that little “PHP update recommended” message in your WordPress dashboard, now’s the time to act. Step 1: Check Your Current PHP Version Before we teach you how to update PHP version in WordPress, let’s see what version you’re running. Via WordPress Dashboard: Via Hosting Panel (like Hostinger or Bluehost): If you’re still rocking PHP 7.2 or earlier, you’re not just behind—you’re hosting a security risk. Step 2: Prepare for the Update (Don’t Skip This!) Upgrading PHP isn’t dangerous… unless you skip the prep. Think of it like changing the oil in your car: better safe than engine failure. ✅ Back It All Up Use plugins like UpdraftPlus or your hosting dashboard to create a full backup of your site. Trust us, you don’t want to test your luck. ✅ Update WordPress Core, Plugins, and Themes Outdated plugins or themes can conflict with newer PHP versions. Always update them first—yes, even that one plugin you forgot you installed in 2019. ✅ Check Compatibility Install the PHP Compatibility Checker plugin to scan your themes and plugins. It’s not perfect, but it’s better than guessing. Step 3: How to Update PHP Version in WordPress (Per Hosting Provider) Now for the main event. Here’s how to update PHP version in WordPress depending on your hosting company: On Hostinger: On Bluehost: On SiteGround: On WP Engine: Can’t find the setting? Reach out to your hosting support—they usually have a button or two that does the trick. Step 4: Post-Update Checklist Congrats, you’ve done it! But don’t celebrate with a confetti plugin just yet. Here’s what to check: If anything looks off, you can always revert to your previous PHP version or restore from your backup. Best Practices for PHP Peace of Mind And if you’re still unsure about the technical side of things, call in your developer or ask your hosting provider. They’re like the lifeguards of the WordPress pool. Final Thoughts: Updating PHP is Your Website’s Superpower Updating PHP might sound intimidating, but it’s one of the simplest ways to boost speed, improve security, and future-proof your WordPress website. So the next time someone asks you how to update PHP version in WordPress, you won’t just know the answer—you’ll also know how to do it the right way. Need Help? That’s What We’re Here For If you’d rather spend your time growing your business than diving into version numbers and server panels, you’re not alone. At SE Rank Pro, a trusted digital marketing company in Chandigarh, we help businesses like yours stay fast, secure, and search engine-friendly. From WordPress maintenance to performance optimization and everything in between—we handle the tech, so you can focus on your customers. Need a hand with PHP upgrades or SEO boosts? Let’s talk.
How to Speed Up Elementor

Elementor is like the Swiss Army knife of WordPress builders—powerful, versatile, and ridiculously easy to use. But let’s face it: even Swiss Army knives can get a little bulky if you keep unfolding every tool at once. That’s where speed issues begin. Whether you’re running a business site or just tweaking your blog’s landing page at midnight while whispering “why is this so slow?”, knowing how to speed up Elementor is your ticket to smoother performance, happier users, and higher search rankings. So, let’s cut the fluff and dive into the real strategies to turbocharge your Elementor site—without needing a computer science degree or a priest for exorcising bloated widgets. Test First: Is It Really Elementor? Before you start throwing plugins overboard and blaming Elementor for all your digital problems, start with a speed test. Tools like Google PageSpeed Insights and GTmetrix are your best friends here. Next, enable Elementor’s Safe Mode. If the editor runs faster in Safe Mode, then it’s not Elementor—it’s either your theme or a rogue plugin. Switch to the Hello theme temporarily or use the Canvas template and test again. Sometimes, it’s not about building better—it’s about decluttering smarter. Hosting: The Elephant in the Server Room You wouldn’t race a Ferrari on a pothole-filled road. Similarly, don’t expect Elementor to fly if your hosting is stuck in 2012. One of the most overlooked solutions in learning how to speed up Elementor is simply switching to better hosting. Avoid free or shared hosting like last season’s fashion trend. Look for LiteSpeed servers with NVMe SSDs and at least 768 MB memory limits. Providers like Rocket.net or ChemiCloud offer LiteSpeed and Cloudflare Enterprise—giving your site a global 100ms TTFB (Time to First Byte). Translation? Your site loads before your visitor has a chance to click away. Elementor Settings That Deserve Your Attention Go to Elementor > Settings > Experiments and activate the good stuff: These features reduce HTML clutter, load scripts only when needed, and help avoid excessive memory usage—basically turning your bloated page into a lean, mean, rendering machine. Don’t forget to switch your CSS Print Method to “External File”, and disable default Google Fonts and Font Awesome if you’re not using them. Why load three libraries just to show a single star icon? Fonts and Icons: Small Details, Big Impact If your fonts are still calling Google’s servers for help, it’s time to bring them home. Hosting fonts locally using WOFF2 format reduces load time significantly. Preload above-the-fold fonts for instant visibility—because nothing screams “unprofessional” like invisible text for 3 seconds. You can also remove unused icon libraries like Eicons or Font Awesome using a few lines of code in your functions.php file. A little technical, but worth it. You’ll thank us later—probably after your coffee. Less is More: Layout & Widget Optimization Elementor gives you many building blocks—but that doesn’t mean you need to build a skyscraper. Reduce the number of sections, columns, and widgets. Use Flexbox Containers instead of old-school Sections and Columns. And yes, combine your image and text with one widget instead of three separate ones (we see you, over-designers). Use custom CSS when needed and avoid animations that look cool but load like they’re stuck in traffic. The goal is minimalism—not a website that looks like it belongs in Times Square. Media Optimization: Make Images Work, Not Weigh Biggest speed killers? Images and videos. Keep image sizes under 1 MB and use the WebP format. Lazy load everything below the fold and preload only critical images above the fold. Hosting videos? Use YouTube or Vimeo via Elementor’s Video Widget. Don’t upload that 120MB drone footage directly into your Media Library—unless you enjoy watching your site crawl. Plugins: The Frenemies of Elementor Plugins are great—until they’re not. Every extra plugin adds more CSS, JS, and database calls. Use tools like Query Monitor or WP Hive to spot the resource hogs. Deactivate unnecessary plugins on pages where they’re not needed using Perfmatters or Asset CleanUp. And don’t fall for the “one plugin for one widget” trap. If you’re installing a 2MB plugin just to add one animated counter, you might want to reconsider your life choices. Caching & CDN: Because Waiting is So 2024 Install a caching plugin like FlyingPress, LiteSpeed Cache, or WP Rocket (but not all three, please). Enable features like: Use a CDN like Cloudflare to serve content faster, especially for global audiences. Bonus: Cloudflare also protects your site from those suspicious traffic spikes that come out of nowhere. Database & Theme Tune-Ups Clean up your WordPress database using tools like WP-Optimize. Limit post revisions and autosaves. Delete unused themes, plugins, and media files. Still running a bloated theme? Switch to Hello, Elementor’s native theme. It’s lightweight, clean, and designed to work seamlessly with Elementor. No bells, no whistles—just speed. Final Words: Elementor Can Be Fast—If You Let It So, does Elementor slow down your site? Not if you know how to speed up Elementor. With the right hosting, smart layout decisions, and a well-optimized setup, your site can hit those 90+ Google PageSpeed scores without breaking a sweat—or your patience. Remember, speed is no longer a luxury. It’s your site’s first impression. Don’t let it be a yawn. Bonus: We Can Help You Do All This (And More) At SE Rank Pro, a results-driven digital marketing company in Chandigarh, we specialize in performance optimization for Elementor, WordPress, and everything in between. From image optimization to full-on CDN integration, we do the heavy lifting so your site can run like it’s late for something important. If you’re tired of DIY tweaks or just want to focus on growing your business, let us help. Visit our website and discover why we’re the go-to digital marketing company in Chandigarh for smart, fast, and SEO-optimized websites.
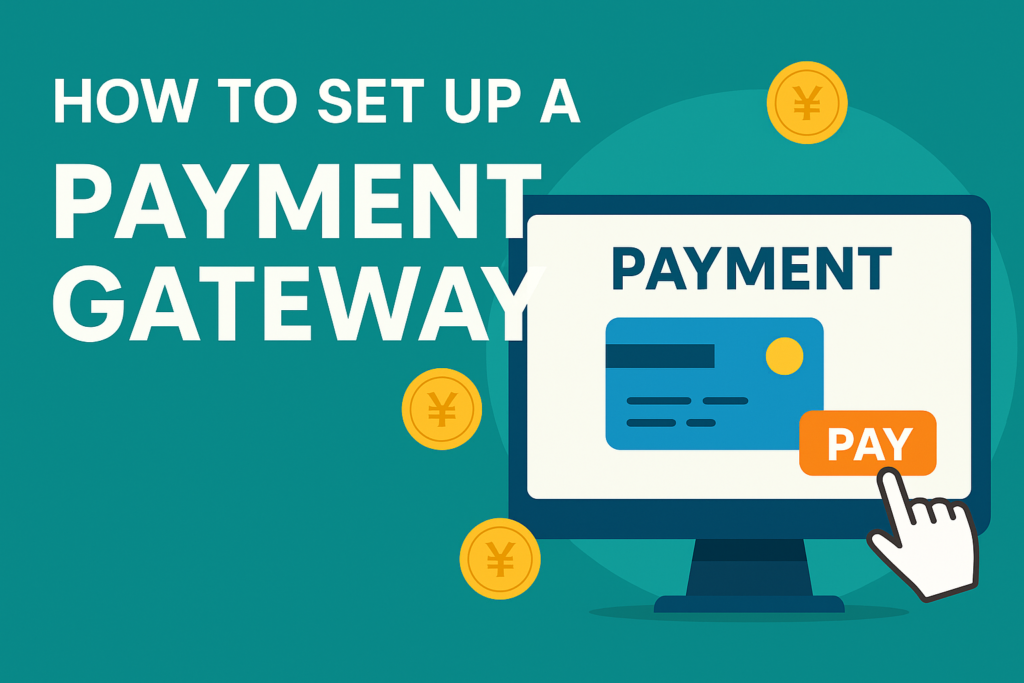
How to Set Up a Payment Gateway
In the golden age of “add to cart,” online payments are no longer a perk—they’re a necessity. Whether you’re running a boutique e-commerce store or a subscription-based SaaS empire, a secure and seamless checkout experience can make or break your revenue. But let’s face it—how to set up a payment gateway sounds like something only tech wizards or coffee-fueled developers can do. Don’t worry, we’re here to demystify the process and help you understand whether you should build your own gateway or simply integrate an existing one (yes, there is a much easier way too). Let’s walk through the process—from infrastructure to integration, all in plain English, with just a sprinkle of professional humor to keep the robots at bay. What’s a Payment Gateway (and Why Should You Care)? Imagine your customer is ready to pay. A payment gateway is what makes that magic happen. It securely carries payment information from your website to the payment processor and brings back an “approved” or “declined” message faster than your cat jumps on your keyboard. It’s the bridge between the shopping cart and the bank—and if that bridge is weak, your sales might fall into the river of abandonment. Setting up a solid gateway = saving the sale. Core Components You Can’t Skip Whether you’re building your own or integrating one, every payment gateway needs a few crucial ingredients: Think of it as building a digital fortress—except the drawbridge accepts Visa, PayPal, and maybe even crypto. Option 1: How to Build a Payment Gateway from Scratch Feeling brave? Here’s how to set up a payment gateway the hard way (aka the developer’s dream): 1. Start With Research & Planning Know your market. What regions are you serving? Which currencies? What payment types do your customers love? Define your budget, timeline, and tech needs. 2. Build Your Infrastructure Create backend systems, secure databases, and reliable APIs. Cloud solutions like AWS work wonders—unless you prefer wrangling servers at 2 a.m. 3. Pick a Payment Processor Choose a processor like Stripe, Adyen, or Worldpay that fits your business model. Evaluate transaction fees, support options, and integration guides. 4. Choose Direct vs Hosted Hosted gateways (like PayPal) are easier but branded. Direct gateways offer full control—and full responsibility. 5. Security First PCI-DSS compliance, SSL certificates, and tokenization are non-negotiable. Think Fort Knox, but with JavaScript. 6. Bank & Card Network Integration You’ll need at least one major bank and card network on your side. APIs and contracts included. 7. Design the Front-End Experience A great checkout UI reduces cart abandonment. Design for simplicity, not for drama. 8. Test Everything Simulate transactions, test for load capacity, and double-check for errors. A single bug can break trust—and your bottom line. 9. Go Live Launch in phases, monitor closely, and fix bugs on the fly. Announce the launch like it’s your startup’s wedding day. 10. Maintain & Support You’re now in charge of updates, security patches, and user support. Congratulations! You’ve earned your digital superhero cape. Option 2: How to Integrate a Payment Gateway (a.k.a. the Saner Way) Not every business needs to reinvent the payment wheel. Here’s how to set up a payment gateway with integration instead: 1. Pick the Right Gateway Stripe, PayPal, and Square are solid picks. Choose based on fees, region, payment methods, and customer preference. 2. Sign Up and Create a Merchant Account Provide business details, verify your identity, and get your API keys. 3. Get Your API Credentials These are the keys to the kingdom. Keep them safe—seriously. 4. Embed the Code Add the HTML/JavaScript snippets into your website. Most platforms like Shopify or WooCommerce already support plugin integrations. 5. Run Sandbox Testing Simulate payments to ensure everything’s working. Test success, failure, chargebacks, and error messages. 6. Switch to Live Mode Replace test keys with production ones. Your site is now accepting real money—time to celebrate (responsibly). 7. Monitor and Optimize Use analytics to track drop-offs, failure rates, and payment trends. A small tweak could lead to big revenue jumps. Build vs. Integrate: The Eternal Question Factor Build Your Own Integrate Existing Cost High upfront, low per txn Low upfront, pay per txn Control Full Limited Speed to Launch Slow Fast Security Burden Yours Handled by provider Flexibility Max Limited by platform TL;DR: Build if you’re big and bold. Integrate if you’re smart and practical. When Should You Outsource the Setup? If you’re thinking, “This is too much,” you’re not alone. Many companies partner with payment development experts like DashDevs or NEKLO to handle the tech maze. Outsourcing is ideal when you: Sometimes, handing off the complex bits is the smartest move in the room. Final Checklist Before You Go Live ✅ PCI compliance confirmed✅ SSL certificate installed✅ API keys configured✅ Test cases passed✅ Interface responsive✅ Bank accounts verified✅ Alerts and logs set up✅ Your team trained You’re ready to process payments like a pro. Conclusion: Payment, Powered Up Knowing how to set up a payment gateway is about more than code. It’s about control, user experience, and setting your business up for secure, scalable growth. Whether you choose to build from scratch or integrate a trusted platform, what matters most is that your customers feel safe—and you get paid without a hitch. ✅ Brought to you by your trusted Digital Marketing Company in Chandigarh We not only understand code—we understand commerce. From web development to SEO, branding to payment gateway integration, we help businesses grow online with strategy and precision. After all, why just sell products when you can sell smarter? At our digital marketing company in Chandigarh, your growth isn’t just a goal—it’s our campaign.
How to Check Site Traffic

Tools, Tips & Competitor Insights Whether you’re running a blog, launching a startup, or quietly stalking your competitor’s site (don’t worry, we all do it), knowing how to check site traffic is not just a technical chore—it’s a digital survival skill. Understanding your traffic gives you the power to double down on what works, fix what doesn’t, and finally explain to your boss why the homepage isn’t converting like a hot pizza ad at midnight. Let’s walk through why traffic matters, how to check it like a pro, and what tools will give you the clearest window into your digital crowd. Why Should You Even Care About Site Traffic? Imagine throwing a party and not knowing if anyone showed up. That’s your website without traffic data. Checking site traffic tells you: This data helps you refine your content, improve SEO strategies, boost conversions, and ultimately make smarter business decisions. How to Check Competitor Site Traffic Without Looking Creepy Yes, you can peek over the digital fence—legally and ethically. Monitoring competitor traffic helps you understand: It’s like doing your homework… by checking the top student’s notes. Free Tools to Start Checking Site Traffic (Even if You’re Broke) 1. Google Analytics The gold standard. GA4 gives detailed info about your site’s performance, from bounce rates to session duration. It’s free and surprisingly powerful—once you get past the slightly terrifying interface. 2. Google Search Console Perfect for seeing how your site performs in search. Check impressions, CTR, and average position for every keyword. It’s like X-ray vision, but for SEO. 3. Ubersuggest (Free Version) Great for beginners. Gives a quick overview of organic traffic, top-performing pages, and keyword rankings. Created by marketing legend Neil Patel, and yes, it’s beginner-approved. 4. Sitechecker Pop in a URL, and Sitechecker gives you three months of estimated traffic, top countries, and traffic sources. Handy and simple. 5. SERanking (Free Trial) See competitor data like organic traffic, keywords, backlinks, and domain trust scores. A little taste of the premium life before you commit. How to Check Site Traffic Like a Pro (With Budget to Spare) 1. Semrush The Swiss Army knife of SEO. Semrush gives you traffic analytics, keyword rankings, top pages, even what your competitors had for breakfast (just kidding, but almost). Ideal for serious marketers. 2. Ahrefs Focused on organic traffic and backlinks. Paste a domain and you’ll get traffic estimates, keyword positions, and even competitor gaps. It’s not cheap, but it’s worth the price tag. 3. SimilarWeb Great for high-level insights. Tells you where your traffic comes from—search, social, direct, referrals. The Chrome extension makes spying easier than ever. 4. AIOSEO (All in One SEO) For WordPress users, AIOSEO adds Search Console data right into your dashboard. You can even analyze competitor URLs and get actionable tips. It’s like having your own SEO analyst living in your WordPress admin panel. 5. MonsterInsights Takes Google Analytics and turns it into a WordPress-friendly visual dashboard. Perfect for users who find GA4 about as user-friendly as tax season. What to Actually Look for in the Traffic Data So you’ve installed a few tools, stared at a bunch of numbers, and now you’re wondering—what’s next? Here are the main metrics to track: Regularly checking these helps you refine content, improve site UX, and figure out what’s pushing visitors away (hint: probably auto-play videos). Choosing the Right Tool Based on Your Goals Here’s a cheat sheet: Remember, you don’t need every tool—just the right one (or two) that fits your goals and budget. Pro Tips: How to Check Site Traffic Like a Strategist Conclusion: Traffic Doesn’t Lie—But It Needs Interpreting Learning how to check site traffic is one of the most powerful habits you can build in your digital routine. It shows you what’s working, reveals what’s broken, and guides you toward smarter content and SEO strategies. And here’s a friendly reminder: Don’t just collect the data—use it. A beautiful chart means nothing if it doesn’t help you grow. Need Help Interpreting Your Traffic? We’ve Got You Covered. If diving into data isn’t your thing (or if your brain shuts down at the word “bounce rate”), we’re here to help. As a trusted digital marketing company in Chandigarh, we specialize in turning your traffic stats into real, measurable growth. From installing analytics to full SEO audits and strategy—our team makes sure every click counts. At SE Rank Pro, we don’t just track traffic—we help you drive it.
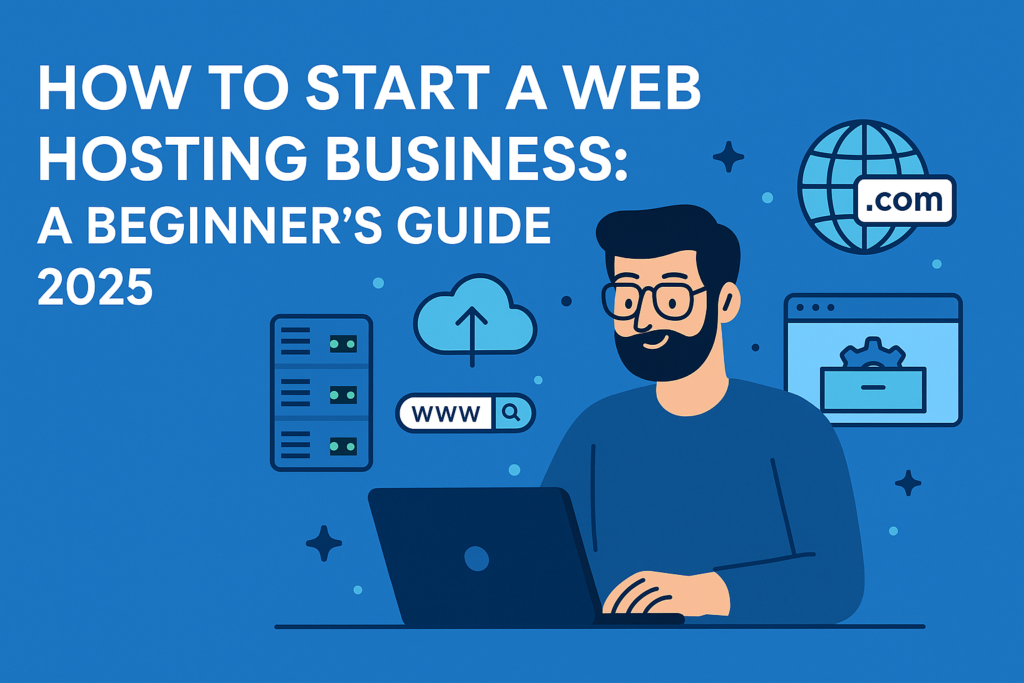
How to Start a Web Hosting Business
Let’s face it—how to start a web hosting business might sound like something reserved for techies locked away in basement server rooms. But the truth is, launching your own hosting business in 2025 is easier, leaner, and surprisingly scalable. You don’t need a PhD in computer science or a warehouse full of blinking machines. What you need is a plan, a niche, and the right partner. With millions of websites going live every day, the demand for web hosting is higher than ever. Whether you’re a freelance web designer, a budding entrepreneur, or someone simply looking to diversify income streams—offering hosting services can be a smart move. Let’s break down exactly how to get your hosting business off the ground. 1. Define Your Vision and Set Clear Goals Before you jump in, ask yourself: Why am I starting a web hosting business? Do I want recurring income? Am I trying to upsell my current digital services? Do I just love helping websites go live (with flair)? Maybe you’re a web developer tired of watching clients struggle with third-party hosting, or you’re a marketing agency looking to retain customers longer. No matter your goal, defining your “why” will determine everything from your business model to your marketing. Think small but smart: niche targeting can help you dominate where big providers can’t. For example, you could specialize in WordPress hosting for local restaurants in Chicago or offer ultra-secure hosting for legal firms. The smaller the pond, the easier it is to stand out as the big fish. 2. Learn the Hosting Basics (So You Don’t Panic Later) You don’t need to become a systems engineer, but knowing how web hosting works is non-negotiable. Familiarize yourself with cPanel, WHM, and the core structure of how websites are hosted. A good host knows how to keep things running—even when a client accidentally deletes their homepage at 2 AM (yes, it happens). Use cPanel’s free beginner courses and treat it like training for your new hotel business—except your “rooms” are websites. 3. Find Your Niche (Because Competing with GoDaddy is… Optimistic) Unless you’ve got a seven-figure ad budget, don’t try to be everything for everyone. Niches win. Focus on a segment that matches your background, geography, or interest. One client, two services. That’s double the revenue, half the marketing effort. Smart, right? 4. Choose a Reseller Hosting Partner (Pick Wisely!) This is where many beginners stumble. Choosing the wrong provider means your customers might experience downtime… and guess who they’ll blame? (Hint: it’s you.) Look for a hosting partner that offers: Providers like GreenGeeks and HostAfrica are excellent options for new resellers. With a good partner, how to start a web hosting business becomes a lot more about branding and customer service—and a lot less about battling server crashes in the middle of lunch. 5. Create Your Brand, Website & Pricing Treat your hosting site like a premium storefront. Clean design, fast load times, and clear messaging are critical. You don’t need a 20-page website either—just focus on: As for pricing: be competitive, but don’t undervalue yourself. Your clients aren’t just paying for server space—they’re paying for your reliability, simplicity, and support. Branding tip: names like “SpeedyHost247” sound catchy but check domain availability first. “DotComDreamHost” is funny—unless it’s already taken. 6. Prioritize Customer Support Like It’s Oxygen Here’s a secret: your hosting business won’t be judged by servers or specs—it’ll be judged by how fast you respond to a confused customer email at 8 PM. You’re not just offering a product; you’re offering peace of mind. Create a robust onboarding email that includes: Professional tip: Offer support channels like WhatsApp, email, or live chat. And if you can’t handle it all alone, outsource or automate what you can. 7. Market Your Hosting Like a Pro You could have the world’s fastest servers, but if no one knows you exist, it doesn’t matter. So get out there and market: Word-of-mouth is still powerful—and in the hosting business, it spreads like wildfire (the good kind). 8. Keep Customers Happy and Scale Gradually Want to know how to start a web hosting business that lasts? Don’t just win clients—retain them. As you grow, move from basic reseller plans to VPS or dedicated servers. Just like hotel chains expand across cities, your web hosting “properties” can scale server by server. Conclusion: Hosting is Easy to Start, Smart to Scale So now you know how to start a web hosting business: pick a niche, choose a reliable partner, create a simple but powerful brand, and offer killer customer support. You don’t need to be the next GoDaddy to succeed. You just need to solve real problems for real clients—and deliver a smooth, friendly experience. At the end of the day, it’s not just about servers and cPanels—it’s about people. And if you want help growing your web hosting business or building the perfect website to attract your first clients, we’re here to help. We’re a leading digital marketing company in Chandigarh that helps entrepreneurs like you turn big ideas into real online success. From SEO content to website design, we’ve helped hundreds of businesses launch their digital dreams. Now it’s your turn. Hosting dreams, one server at a time. 💻
How to Cancel WordPress Subscription
Let’s face it—committing to a WordPress plan can feel like a relationship. At first, it’s exciting, everything’s shiny and promising. But somewhere down the line, maybe the budget tightens, or you find a better CMS match, and it’s time to say, “It’s not you, it’s me.” That’s when you need to know exactly how to cancel WordPress subscription without accidentally nuking your site or missing out on refunds. In this guide, we’ll walk you through how to cancel a WordPress subscription, whether you’re using WordPress.com or the more DIY-style WordPress.org. Each comes with its own roadmap, and trust us—knowing the difference is half the battle. Step 1: Know Your WordPress Type Before You Cancel You’d be surprised how many users try to cancel something they don’t actually have. WordPress.com is the fully hosted service where WordPress handles hosting, backups, and security. You may be subscribed to a Personal, Premium, Business, or eCommerce plan. WordPress.org is self-hosted. That means you’re paying a third-party provider for hosting, domain registration, or premium plugins/themes. Canceling here involves logging into other platforms—not WordPress itself. Knowing which one you’re using is the first real step in mastering how to cancel WordPress subscription properly. Step 2: How to Cancel WordPress.com Subscription Canceling from WordPress.com is usually smooth, but here’s a clear checklist: 2.1 Log In to Your Account Head to WordPress.com and log in using your credentials. Easy enough. 2.2 Navigate to Plans or Subscriptions Click your profile photo → go to Account Settings → locate Plans or Subscriptions. 2.3 Select the Plan to Cancel You may see more than one plan (thanks, “Free Domain” add-ons). Make sure you’re canceling the correct one. 2.4 Follow the Cancellation Process Click on “Manage” or “Cancel Plan.” WordPress might try to woo you with discount offers like a clingy ex. Politely decline and move on. 2.5 Watch Your Inbox A cancellation confirmation email will arrive—keep it like you keep your coffee receipts, just in case. 2.6 Backup Before You Break Up Export your site content via the Tools > Export feature. Trust us, your future self may want that old blog post about banana bread. Step 3: What About WordPress.com Refunds? Refunds follow a don’t-blink-or-you’ll-miss-it logic: If you fall within the refund window, initiate it immediately. Their live chat team is usually responsive (and surprisingly empathetic). Step 4: How to Cancel WordPress.org (Self-Hosted) This is where people go wrong. You don’t cancel with WordPress—you cancel with your hosting provider. 4.1 Log In to Your Hosting Dashboard Think Bluehost, SiteGround, Hostinger—whoever you signed up with. 4.2 Go to Billing/Subscription Section The label might vary: “Billing,” “My Services,” “Renewals.” Explore a little. 4.3 Cancel the Hosting Plan Click “Cancel” or “Turn Off Auto-Renew.” Some hosts will require you to speak with support (bring coffee). 4.4 Handle the Domain Decide whether to: Domains are like digital real estate—don’t let them expire unless you’re sure you’re done. 4.5 Backup Your Site Use UpdraftPlus, Jetpack Backup, or good ol’ FTP and phpMyAdmin export. We had a client who didn’t back up his site. Two months later? Regret hit harder than a Monday morning. Step 5: Cancelling via Managed WordPress Hosts (e.g., Kinsta) Managed WordPress platforms like Kinsta streamline the process, but with a few added warnings: Within 30 Days Full refund minus any extra charges. The plan is canceled immediately. After 30 Days The plan stays active till the end of your billing period, and then quietly retires. Kinsta also allows you to cancel or remove individual add-ons (like PHP upgrades, external backups, etc.) without touching the whole plan. Step 6: Common Issues (And How to Dodge Them) Step 7: Before You Pull the Plug… Take a deep breath and ask yourself: If you’re unsure, consider downgrading or pausing instead. Full cancellation should be your last resort, not your first panic move. Final Thoughts Learning how to cancel WordPress subscription might feel like you’re navigating a maze of settings, hosting panels, and backup tools. But with the right steps, it’s completely doable—and less frustrating than that time your plugin update broke the homepage. Whether you’re freeing up budget, moving platforms, or simply changing direction, doing it right means less stress, no billing surprises, and peace of mind. Need Help with WordPress or Looking to Migrate Smoothly? We’re a leading Digital Marketing Company in Chandigarh helping clients manage WordPress the smart way—whether you’re scaling up or winding down. If you need expert advice, faster migration, or subscription management done right, we’re just a click away. No WordPress mess too big, no SEO goal too small.
How to Unpublish a Page in WordPress
Whether you’re revamping your content, correcting a hasty publish, or hiding a page that’s “not quite ready for prime time,” learning how to unpublish a page in WordPress is a skill every website owner should master. It might seem like a small thing, but an outdated or broken page can make your site look like it belongs in 2009—and not in a good way. Let’s explore the different ways you can unpublish pages the right way, all while keeping your SEO and user experience intact. Why Would You Want to Unpublish a Page? Not all content ages like fine wine. Some pages grow stale, some just stop serving your business, and others need a facelift. You might want to unpublish a page because: Instead of deleting pages—which can hurt SEO and create broken links—knowing how to unpublish a page in WordPress helps you preserve your site’s structure while still maintaining control. How to Unpublish a Single WordPress Page The fastest way to hide a single page from the public is to convert it back to a draft. Here’s how: Voilà. Your page is now hidden but safely stored for future edits. Just don’t forget it exists—you’d be surprised how many people accidentally ghost their own content. Oh, and if the page was getting traffic from Google, consider adding a 301 redirect to another page to avoid losing SEO juice. How to Unpublish Multiple Pages Using Bulk Actions If you’re doing some digital spring cleaning, the bulk unpublish feature will save you hours (and likely a headache or two). Here’s what to do: This will hide all selected pages from public view while keeping them safe in your dashboard. It’s like putting them in digital Tupperware—safe, sound, and ready for later. Make It Private or Password-Protected (No Need to Ghost Everyone) Sometimes you want your page off the public web but still accessible to a specific audience. That’s where making it Private or Password Protected comes in. To make a page private: To password-protect a page: This is perfect for client previews, internal pages, or secret landing pages you’re not ready to shout about just yet. Make the Page Members-Only (For Advanced Users) For more robust content restriction, consider installing a membership plugin like MemberPress or Paid Memberships Pro. These tools allow you to: It’s an excellent option for course creators, subscription services, or any site offering gated content. Plus, it’s a professional way to keep content controlled without worrying about whether someone found your “hidden” URL. Temporarily Unpublish Your Entire WordPress Site Need to pause everything? You don’t need to frantically unpublish page by page. Instead, put your site into Maintenance Mode. Option 1: Use a Plugin Plugins like SeedProd or WP Maintenance Mode let you: Option 2: Manually Add a .maintenance File Feeling techy? You can manually enable maintenance mode by uploading a .maintenance file to your WordPress root directory using FTP and inserting the code: <?php $upgrading = time(); ?> Don’t worry—removing the file puts your site back online. SEO Considerations When Unpublishing Pages If you’re wondering how to unpublish a page in WordPress without tanking your SEO, pay attention here: For long-term management, consider plugins like Yoast SEO or Rank Math to help with redirects and meta settings. Automate the Process: Schedule Page Unpublishing Using the PublishPress Future plugin, you can schedule your pages to automatically revert to draft, archive, or delete at a future date. This is ideal for: Why do the work yourself when WordPress can do it for you? Final Thoughts: Unpublishing Done Right Learning how to unpublish a page in WordPress isn’t just about removing content—it’s about doing it smartly, strategically, and without leaving broken links (or confused visitors) in your wake. Whether you’re hiding a page temporarily, updating a campaign, or cleaning house, you now have all the tools to do it right. And if this all sounds like a lot to handle, don’t worry—we’re here to help. 🚀 Need Help? Call the Pros At SE Rank Pro, a trusted digital marketing company in Chandigarh, we help businesses like yours manage and optimize their WordPress sites—from unpublishing pages to full redesigns, SEO upgrades, and everything in between. Let us take care of your WordPress headaches, so you can focus on growing your business. Because your website deserves better than “Oops, this page doesn’t exist.” Ready to take control of your content? Let’s talk.
What Is a Wildcard Redirect?

If you’ve ever tried moving your website or restructuring your URLs without setting proper redirects, you’ve probably met the dreaded 404 error. And if you haven’t, you’re one broken link away from chaos. Whether you’re rebranding, merging domains, or just tidying up your site architecture, one tool stands out for its versatility: wildcard redirects. But wait—what is a wildcard redirect, exactly? And why is everyone (at least the smart webmasters) talking about it? Let’s break it down, step by step, and keep your SEO—and sanity—intact. So, What Is a Wildcard Redirect? A wildcard redirect (also called a “catch-all redirect”) is a powerful redirect rule that lets you redirect multiple URLs at once, without writing separate rules for each page. It uses the asterisk * as a placeholder to match any string of characters. For example, say you’re moving everything from oldsite.com/blog/* to newsite.com/news/*. Instead of writing rules for every single article, you can create one wildcard rule that catches them all. (Cue the Pokémon theme.) Technically speaking, what is a wildcard redirect? It’s a way to handle redirects at scale, especially during domain changes, subdomain shifts, or URL cleanups. Wildcards make sure even the odd, mistyped, or long-forgotten URLs find a new home. When Do You Need One? Wildcard redirects are perfect for situations like: Let’s be honest: redirecting every page manually is like alphabetizing a library by hand—it’s tedious, slow, and not exactly fun at parties. Wildcard redirects are your automation heroes. How Does It Actually Work? A wildcard redirect works by matching a pattern instead of a single path. For example, the following .htaccess rule: RewriteEngine OnRewriteRule ^old-folder/(.*)$ /new-folder/$1 [R=301,L] This line redirects everything in /old-folder/ to its equivalent in /new-folder/, preserving filenames and parameters. So old-folder/about-us.html becomes new-folder/about-us.html. It’s clean, efficient, and—when used properly—Google-friendly. Methods to Set Up Wildcard Redirects 1. Using .htaccess (Apache Servers) This is the most common method, especially if you’re using shared hosting. You can edit the .htaccess file via cPanel or FTP. Sample redirect: RewriteEngine OnRewriteCond %{HTTP_HOST} ^oldsite.com [NC,OR]RewriteCond %{HTTP_HOST} ^www.oldsite.com [NC]RewriteRule ^(.*)$ https://newsite.com/$1 [L,R=301] This redirects all requests from oldsite.com to newsite.com, regardless of what comes after the slash. Pro tip: Back up your .htaccess file before editing it. Unless you enjoy debugging white screens at 2 AM. 2. Using cPanel (The No-Code Way) Most web hosts provide a Redirects section in cPanel where you can: It’s a great option for non-developers or busy marketers who’d rather not touch server files directly. 3. WordPress Plugins If you use WordPress, plugins like Simple 301 Redirects allow wildcard redirects via a user-friendly interface. Just remember to test after enabling the “Use Wildcards?” checkbox. Wait… Is There a Catch? Well, sort of. In short, what is a wildcard redirect? It’s your best friend if used wisely. Otherwise, it can become that clingy friend who shows up everywhere uninvited. Do You Need a Wildcard SSL Certificate Too? If you’re redirecting many subdomains, you’ll also want a wildcard SSL certificate to encrypt traffic. A wildcard SSL lets you secure *.yourdomain.com without buying a new certificate for each subdomain. It’s cost-effective, fast to issue, and keeps Google (and your users) happy. Common Use Cases and Examples 1. Redirect all .php files to .html RewriteEngine OnRewriteCond %{REQUEST_URI} .php$RewriteRule ^(.*).php$ /$1.html [R=301,L] 2. Force HTTPS RewriteEngine OnRewriteCond %{HTTPS} offRewriteRule ^(.*)$ https://%{HTTP_HOST}%{REQUEST_URI} [L,R=301] 3. Redirect from old domain to new domain RewriteEngine OnRewriteCond %{HTTP_HOST} ^oldsite.com [NC]RewriteRule ^(.*)$ https://newsite.com/$1 [L,R=301] Each of these examples showcases just how flexible wildcard redirects can be. Final Thoughts: Wildcards Save the Day (and Your SEO) So, back to the question: what is a wildcard redirect? It’s a time-saving, SEO-preserving, stress-reducing way to mass-redirect traffic from one place to another. Whether you’re doing a full domain change or just fixing some messy URL patterns, wildcard redirects let you do it without manually writing hundreds of rules. Just remember: don’t go wild with your wildcards. Plan your redirects carefully, test thoroughly, and always monitor traffic afterward. Need Help with Wildcard Redirects? We’re a Digital Marketing Company in Chandigarh that knows the art (and science) of SEO, site migrations, and server-side wizardry. Whether you’re dealing with .htaccess confusion, redirect chains, or trying to stop those pesky 404s from haunting your site—we’re here to help. Let us make your website transitions seamless and search-engine safe.