What Does Flushing DNS Do?

Ever typed in a website only to be met with a cryptic error message or the wrong page entirely? Before you assume your internet has taken the day off, the solution might be simpler than you think. Enter DNS flushing—your computer’s way of saying, “let me double-check that address.” Flushing your DNS might sound technical, but it’s actually a beginner-friendly fix that can solve a surprising number of internet issues. In this guide, we’ll break it all down and answer the central question: what does flushing DNS do? What Is DNS and How Does It Work? DNS stands for Domain Name System. It acts like the internet’s phonebook, translating human-readable domain names like www.example.com into numerical IP addresses like 192.0.2.1, which your device uses to locate and connect to websites. When you visit a website, your device stores its IP address in a temporary memory called the DNS cache, allowing for faster load times the next time you visit. What Is the DNS Cache? The DNS cache is like speed-dial for your internet activity. Instead of looking up the address each time, your system remembers where it went last time. This means quicker access to websites you’ve visited before. But, just like keeping your ex’s number saved isn’t always ideal, the DNS cache can become outdated or corrupted, causing you to connect to old or incorrect IPs. So, What Does Flushing DNS Do? Think of flushing DNS as cleaning the slate. It erases all saved entries in your DNS cache, forcing your computer to request fresh data the next time you access a website. Here are some practical examples of what flushing DNS does: Why Should You Flush Your DNS? Is Flushing DNS Safe? Absolutely! Flushing DNS is safe, quick, and doesn’t impact your system negatively. Think of it as giving your internet a reset button. The worst-case scenario? The first visit to a site might take a half-second longer as your system rediscovers the address. How to Flush DNS on Different Operating Systems For Windows: For macOS: For Linux: On Chrome Browser: What Happens After Flushing the DNS? Once you flush your DNS: You’ll start fresh, and future visits to sites will go back to being fast and seamless. How Often Should You Flush DNS? There’s no strict schedule. Here are a few good times to do it: Flushing DNS is a low-effort, high-impact task—kind of like finally updating your password from “123456.” Real-Life Fix: A CDN Case A real-world case involved a user whose CDN-based images weren’t loading. Everything seemed fine externally, but a DNS flush on their system fixed the issue instantly. What does flushing DNS do in such a case? It reconnects you to the most current IP routing—no tech support required. Final Thoughts: Take Control of Your Connection Flushing your DNS is a quick, safe, and effective way to maintain your internet health. Whether you’re solving access issues, boosting security, or just starting fresh, understanding what does flushing DNS do gives you an edge in managing your online experience. So, next time the web feels stuck, don’t reboot your entire system—just flush your DNS. Bonus Tip from a Digital Marketing Company in Chandigarh As a trusted digital marketing company in Chandigarh, we often advise businesses on website visibility and troubleshooting. One of the first tricks we suggest during DNS errors is a simple DNS flush. Why? Because what does flushing DNS do? It helps clear invisible barriers between your website and its visitors. Stay fast, stay visible, and stay safe. Got questions? Reach out to our team for more digital insights.
How to Embed a YouTube Short
In a world where attention spans are shrinking faster than smartphone bezels, short-form videos have become the new ruler of online engagement. Enter YouTube Shorts—a vertical, snack-sized, mobile-first video format designed to grab attention in less than a minute. If you’ve ever wondered how to embed a YouTube Short on your website to catch that attention and convert it into action, you’re in the right place. Whether you’re a creator, a brand, or just tired of your webpage looking like a 2010 brochure, embedding Shorts is one of the fastest ways to boost user interaction and keep your audience scrolling (or watching). Let’s break it all down—from what they are to the smartest, easiest ways to embed them on your WordPress site. What is a YouTube Short, Anyway? YouTube Shorts are vertical videos lasting up to 60 seconds. They’re designed for quick consumption, often made using smartphone cameras, and are now a staple in content marketing. Think of them as TikToks with YouTube’s reliability, or Instagram Reels without the filters of your third cousin’s vacation clips. But here’s the kicker: when you embed them on your site, they act like regular YouTube videos… unless you know how to work around it. That’s why knowing how to embed a YouTube Short properly matters more than ever. Why Embed YouTube Shorts on Your Website? 📈 1. Increased Dwell Time People stay longer on pages with video content. A 30-second video can do what a 300-word paragraph can’t—hook and convert. ⚡ 2. Bite-Sized Information Use Shorts to deliver product overviews, tutorials, testimonials, or just show your brand’s personality. It’s the fastest way to “say a lot by saying little.” 🔍 3. SEO Superpowers Google loves video. Embedding YouTube Shorts can help you rank higher on search engines—especially if your content is optimized. 🎥 4. More Views, More Subscribers Viewers can engage, like, and even subscribe to your channel straight from the embedded video. It’s a two-way marketing street. So, the question isn’t should you embed, but why haven’t you started already? Three Simple Methods on How to Embed a YouTube Short in WordPress Method 1: Use The Plus Addons for Elementor Plugin This method is best if you’re already using Elementor and want full control over design. Steps: It’s almost like giving your Shorts a tuxedo before inviting them to the party. Method 2: Embed Using iFrame Code For those who speak a little HTML (or pretend to during meetings). Steps: Quick and effective, though a bit limited in design options. Method 3: Modify the URL Directly This method is practically a magic trick. Steps: WordPress will automatically embed the video for you—no plugin or espresso required. So now you know how to embed a YouTube Short using three different methods. But if you’re serious about standing out, it doesn’t hurt to go the extra mile with customization. Pro Tips for Making Your Shorts Look… Sharp Using Elementor or any page builder? Try these tricks: Presentation matters—no one watches a movie in portrait mode unless it’s intentional. Advanced Embedding Tools (Beyond WordPress Plugins) Want to take embedding to the next level? Here are some platforms to consider: These tools don’t just embed—they enhance. Is It Legal to Embed YouTube Shorts? Yes. Embedding is fully supported by YouTube’s Terms of Service—as long as you’re using the official embed options or URLs. Just make sure your site isn’t child-oriented unless you configure it accordingly (to avoid ad personalization issues). Final Thoughts Knowing how to embed a YouTube Short is no longer a geek-only skill—it’s a modern-day content hack. Whether you’re a solo creator, startup, or established business, embedding Shorts offers a smart way to connect, engage, and convert. The plugin method gives you design flexibility, the iFrame method is beginner-friendly, and URL modification is the fastest trick in the book. Add a few smart layout tweaks, and your site won’t just inform—it’ll entertain 💼 Need Help? Let the Experts Handle It. If you’d rather focus on your content and let someone else take care of the embedding, SEO, layout, and engagement strategy—that’s where we come in. We’re a digital marketing company in Chandigarh that helps brands grow smarter and faster. From WordPress wizardry to full-scale video marketing, we turn views into value. Whether you’re a startup or scaling business, we help embed your content and your vision—seamlessly. Let’s just say… we know how to embed a YouTube Short and a whole lot more.
How to Start a Fashion Blog
Have you ever looked at your wardrobe and thought, “Wow, I could definitely inspire the world with these fits”? You’re not alone—and you’re not wrong. If fashion is your passion, launching your own fashion blog is one of the best ways to showcase your style, share your insights, and even turn it into a money-making empire (or at least something to fund your Zara habit). In this guide, we’ll walk you through how to start a fashion blog—from niche selection to monetization—with tips that make this journey feel more like a runway and less like a tax form. 1. Start with Your Fashion Niche: Yes, You Need One “Fashion” is a vast universe. Are you into thrifted vintage looks? High-end couture? Plus-size fashion? Men’s minimalist styles? Sustainable brands? Choosing a niche helps you attract a loyal audience who knows exactly what you’re about. It also makes it easier to create content that hits home—and ranks well on Google. Plus, a niche keeps you from becoming just another fashion blog. Instead, you’re the go-to source for Parisian streetwear or budget-friendly mom fashion or goth-glam festival looks. Own it. 2. Pick a Catchy Blog Name and Secure That Domain Choosing a name is the digital equivalent of choosing your brand’s signature scent—once people associate you with it, there’s no going back. Make it unique, memorable, and relevant to your niche. Bonus points if it’s easy to spell (no one’s Googling “fashion4evahhh123” and getting it right). Use a domain registrar or go with a platform like WordPress or Wix to purchase both your hosting and domain in one stylish bundle. Keep it clean: no hyphens, no digits. Think: ChicOnRepeat.com not Chic-on-99-Repeat.biz. 3. Set Up Your Blog: Design Like You Dress When learning how to start a fashion blog, one truth becomes painfully clear: your blog has to look good. Readers are judging you by your layout—before they even see your outfit post. Choose a clean, responsive theme. Whether you use WordPress or Wix, go for something customizable so you can reflect your brand’s personality. Classy or edgy? Minimalist or bold? The same rules apply as they do for your closet. Need a logo? Think timeless over trendy. Helvetica > Comic Sans. Always. 4. Create Killer Content (Not Just #OOTD Posts) Yes, visuals are critical. But your content needs to offer real value too. Think: An editorial calendar will save your life (and your sanity). Schedule your posts, plan your ideas, and balance visuals with written insights. Quality > quantity, always. This isn’t a race to 100 posts—it’s a journey to influence. If you’re wondering how to start a fashion blog that actually grows, content is your fuel. It keeps your audience engaged and coming back—just like that perfect leather jacket that never goes out of style. 5. Optimize for SEO: The Not-So-Glamorous Secret Weapon Fashion may be glamorous, but blog traffic doesn’t just arrive because you wore sunglasses indoors. You need search engine optimization (SEO). Use keyword research to discover what your audience is looking for. Sprinkle in terms like “best winter outfits,” “vegan leather boots,” or “affordable Parisian fashion.” Add alt text to images, optimize your titles and meta descriptions, and make sure your blog loads quickly. SEO is the foundation of long-term blog visibility—and it’s one of the most overlooked steps when beginners ask how to start a fashion blog and actually grow it. 6. Promote Like a Pro Having a blog and not promoting it is like wearing couture to your kitchen. Get out there! Also, build a community. Respond to comments, join fashion forums, and support other bloggers. Blogging is not a solo sport—it’s an industry of collaborations, shoutouts, and shared audiences. 7. Make That Money, Honey: Monetize Your Blog Now let’s talk income—because if you’re putting in the work, you deserve to see a return. Here are some monetization ideas: Pro tip: Keep monetization natural. Your readers are savvy—if they smell too much sales pitch, they’ll bounce faster than a flash sale. Final Thoughts Learning how to start a fashion blog isn’t just about blogging—it’s about brand building. You’re not just another fashion lover; you’re becoming a trusted voice, a visual storyteller, and potentially a paid influencer. So go ahead—pick that niche, design your blog, hit publish, and own the digital runway. 👗 Need Help Turning Your Fashion Blog into a Brand? We’re a digital marketing company in Chandigarh with a passion for creative brand storytelling, SEO optimization, and helping style-savvy bloggers grow into full-fledged fashionpreneurs. Whether you need help with SEO, blog setup, monetization strategy, or social media growth—we’ve got you covered. Let us help you strut your blog to success—because great fashion deserves a spotlight.
How to Change Font on WordPress
Fonts are the unsung heroes of your website design. They set the mood, highlight your brand identity, and (let’s be honest) can make or break your visitors’ reading experience. If you’ve ever asked yourself how to change font on WordPress, you’re in the right place. Let’s dig into this fontastic (pun intended!) guide that will cover every possible way you can tweak your site’s typography. Understanding Web Fonts in WordPress Before we jump into the how-tos, let’s quickly define web fonts versus locally hosted fonts. Web fonts—like Google Fonts—are hosted on external servers and loaded dynamically. Locally hosted fonts, meanwhile, live on your own server, giving you total control (and fewer worries about external dependencies). The four main font types to know? Accessibility tip: Always choose legible fonts and maintain at least 16px for body text. Why Change Fonts in WordPress? Fonts do more than just look pretty. They shape how visitors feel about your brand and impact readability (and ultimately conversions!). A site with poor typography can be like a bad hair day—it’s hard to ignore. Luckily, learning how to change font on WordPress gives you the power to craft a beautiful first impression. 8 Proven Ways to Change Fonts on WordPress Here’s your font menu, served up hot and fresh: 1️⃣ Using the Theme Customizer The easiest way for many users! Go to Appearance → Customize → Typography. Depending on your theme (like Sydney), you’ll see options to tweak headings, body text, and even menus. Click, pick a font from the dropdown, and watch the real-time preview work its magic. 2️⃣ Using the Full Site Editor (FSE) For block-based themes like Twenty Twenty-Two, go to Appearance → Editor. Click the Styles icon, then Typography. Here, you can select global fonts for text, links, and more—like a digital wardrobe change for your site. 3️⃣ Using the Block Editor (Gutenberg) Want to change fonts in specific posts or pages? Edit the page, select the text block, and adjust typography settings in the sidebar. You can also tweak font weight and appearance (bold, italic, etc.). Handy, but only for that specific page. 4️⃣ Using a WordPress Font Plugin If your theme’s typography options are more limited than your grandma’s cookie jar, plugins can be a lifesaver.Install Fonts Plugin | Google Fonts Typography via Plugins → Add New. Once activated, head to Appearance → Customize, and find a new Fonts section. Customize body, heading, and even button fonts—all without touching a line of code. 5️⃣ Using a Theme Builder (Divi or SeedProd) Theme builders like Divi come with built-in font options. In Divi, go to Theme Customizer → Typography for global changes. Or use the visual builder: select a module (like text), then adjust fonts in the design tab. With SeedProd, edit sections in the drag-and-drop builder and set fonts under “Advanced” typography settings. 6️⃣ Manually Adding Custom Fonts (CSS & functions.php) Feeling brave? Go old-school! In functions.php of your child theme, enqueue your font like this: function add_my_font() {wp_enqueue_style(‘my_font’, ‘https://fonts.googleapis.com/css2?family=Roboto&display=swap’, false);}add_action(‘wp_enqueue_scripts’, ‘add_my_font’); Then, in style.css, assign your font: body, h1, h2, h3 { font-family: ‘Roboto’, sans-serif; } Pro tip: Use a child theme to avoid heartbreak after theme updates. 7️⃣ Adding Custom Fonts in FSE Themes (theme.json) Full site editing themes like Twenty Twenty-Two use theme.json. Add your font files to /assets/fonts, then edit theme.json to register them. It’s like cooking a gourmet meal: more prep work, but oh-so-worth it. 8️⃣ Using Locally Hosted Fonts Prefer to host your fonts? Upload them to a /fonts folder in your theme. Then, use @font-face in CSS: @font-face {font-family: ‘MyFont’;src: url(‘fonts/MyFont.woff’) format(‘woff’);}body { font-family: ‘MyFont’, sans-serif; } This keeps everything in-house for performance and privacy wins. Tips & Best Practices ✅ Use only 2-3 fonts max—simplicity is elegant (and loads faster!).✅ Test your fonts across devices. Mobile-friendly is non-negotiable.✅ Pair fonts with contrast: Sans Serif for body, Serif for headings.✅ Keep legibility front and center—some fonts look fancy, but… no one can read them! FAQs: Your Fonty Questions Answered! Q: How many fonts should I use?A: Two to three—one for body, one for headings, and maybe a fun accent. Q: Can I use downloaded fonts?A: Yep! With plugins or by manually hosting them. Q: What about the Twenty Twenty-Two theme?A: Use the Full Site Editor and edit theme.json for custom fonts. Q: Best plugin for changing fonts?A: Fonts Plugin | Google Fonts Typography is a solid choice. Wrapping Up Now that you’ve unlocked the secrets of how to change font on WordPress, your site’s personality can truly shine. Whether you’re using a plugin, theme builder, or getting your hands dirty in CSS, you’ve got plenty of options to fit your style and skill level. How Our Digital Marketing Company in Chandigarh Can Help At SErank Pro, a top digital marketing company in Chandigarh, we don’t just tweak fonts—we transform websites into high-performing, visually stunning hubs. Let us elevate your brand and create an online experience that’s as unique as your business. If you’re ready to make your site not just beautiful but also search-engine optimized, let’s chat! 🚀
What Are WordPress Hooks?
A Complete Guide When diving into the world of WordPress development, one term you’ll encounter repeatedly is “hooks.” If you’re wondering what WordPress hooks are and why everyone keeps talking about them, you’re in the right place. In this blog title, we’ll explore how hooks power up your WordPress site and how you can use them to create magic—without editing the core files! Understanding Hooks: The Foundation of Customization So, what exactly are hooks? Think of them as predefined “checkpoints” or “bus stops” in WordPress where you can hop in with your custom code. These checkpoints make it possible to modify how WordPress works without changing its core. In a world full of plugins and themes, hooks are the secret sauce that keeps things flexible. You might wonder, “Why not just edit the WordPress core files?” Well, that’s a sure way to break your site during the next update (and to invite panic attacks when the site goes down!). Instead, hooks give you a safe and future-proof way to extend or modify WordPress. Types of WordPress Hooks 1. Actions (Action Hooks) Actions let you do something when WordPress reaches a certain point. They’re like party crashers who don’t just observe but jump in and start dancing. Actions don’t return anything; they just act. For instance, you might use an action to enqueue a new JavaScript file on your website: function my_custom_script() {wp_enqueue_script( ‘my-script’, ‘script.js’, false );}add_action( ‘wp_enqueue_scripts’, ‘my_custom_script’ ); 2. Filters (Filter Hooks) Filters, on the other hand, take the data that WordPress gives them, modify it, and hand it back—like a chef taking a bland dish and adding just the right seasoning. Here’s a simple example: function change_excerpt_length( $length ) {return 20;}add_filter( ‘excerpt_length’, ‘change_excerpt_length’ ); Actions vs. Filters: Key Differences To put it simply: Think of actions as a one-way trip—do your job and move on. Filters, however, return the favor by sending the modified data back for reuse. How Hooks Work in WordPress WordPress hooks come alive through callback functions. These are the bits of code you write that actually do the work. You can also set a priority (default is 10) and the number of arguments your callback accepts. Priorities are like the line at the coffee shop—the lower the number, the sooner your function gets called. Practical Examples Let’s get our hands dirty! ✅ Action Example:Add a friendly greeting to your site’s header: add_action( ‘wp_head’, ‘custom_greeting’ );function custom_greeting() {echo ”;} ✅ Filter Example:Change the default “Read More” link: function modify_read_more( $link ) {return str_replace( ‘Read More’, ‘Keep Reading!’, $link );}add_filter( ‘the_content_more_link’, ‘modify_read_more’ ); Creating Your Own Custom Hooks Sometimes, you’ll want to create custom hooks in your plugin or theme so others can extend your code. Here’s how: Custom Action: do_action( ‘my_custom_action’ ); Custom Filter: $value = apply_filters( ‘my_custom_filter’, $value ); Just remember to prefix your hook names to avoid conflicts—nobody wants a hook name clash in the middle of a busy WordPress party! Where to Register Hooks You’ve got two safe spots: Just don’t edit core files—unless you want to test the depths of your WordPress recovery skills! Advanced Hook Management Not happy with how someone else’s hook works? Use: Or adjust the priority to control when your function runs. Common Use Cases for Hooks Additional Resources To dive deeper, here’s what you can bookmark: These tools help you spot hooks on your site and become a true WordPress wizard. Conclusion Hooks are what make WordPress so flexible, so customizable, and (sometimes) so mysterious. But as you’ve seen in this What are WordPress Hooks, they’re not so scary once you understand how they work! If you’re a developer (or an aspiring one), mastering hooks will unlock countless possibilities to extend and tailor WordPress to your needs. How We Can Help as a Digital Marketing Company in Chandigarh As a digital marketing company in Chandigarh, we specialize in leveraging hooks and other advanced WordPress techniques to craft custom solutions that boost your online presence. Whether it’s creating sleek websites, optimizing your content, or integrating powerful features, our team at digital marketing company in Chandigarh ensures your website performs at its best—without compromising on style or security. Got questions or want to explore custom WordPress solutions? Let’s hook into success together!
What is White Label Saas
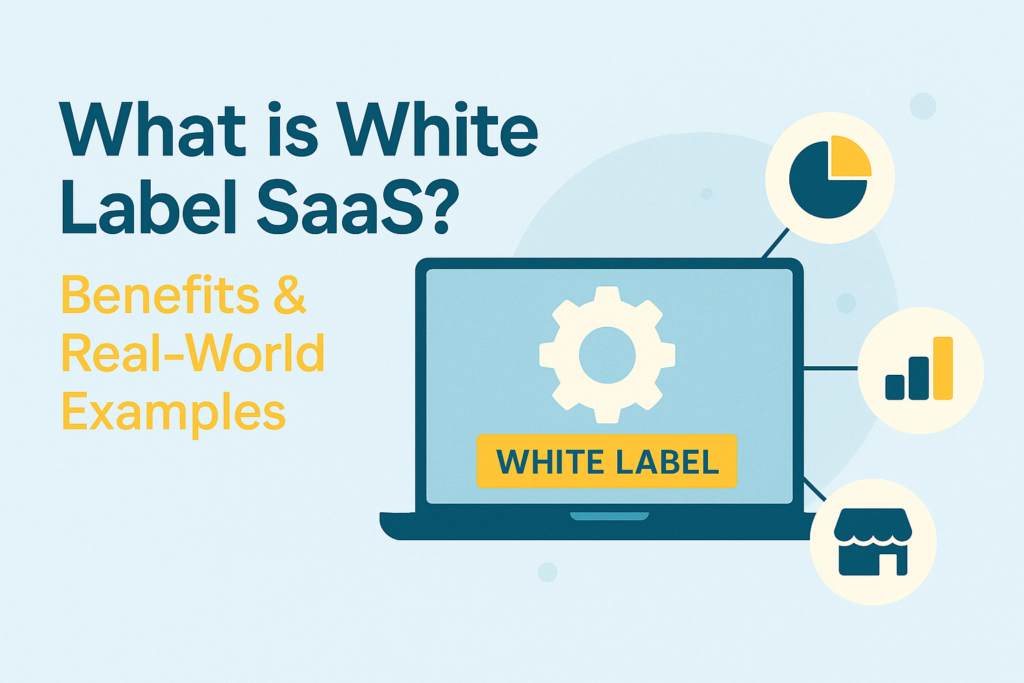
What is White Label SaaS? A Comprehensive Guide for Agencies and Entrepreneurs The SaaS market is booming, with revenue projections reaching $282.2 billion this year alone. Amid this surge, one trend stands out for agencies and entrepreneurs alike—white-label SaaS. But what is white label SaaS exactly, and how can it transform your business? Let’s break it down. What is White Label SaaS? In simple terms, white label SaaS is software developed by one company but rebranded and sold by another. Picture it like buying a generic cake mix and selling it in your own bakery with your unique frosting and logo. Only in this case, it’s a software product—think CRMs, SEO dashboards, or social media tools—ready for you to brand as your own. While white label SaaS may sound like a secret agent-level operation, it’s actually a practical way to skip the expensive and time-consuming process of building software from scratch. You focus on your brand and clients, while the original developer handles the nuts and bolts. How White Label SaaS Works The process is delightfully straightforward: For example, LevelUp provides a mobile payment platform that restaurants can rebrand as their own, sparing them the headache of app development. Advantages of White Label SaaS White label SaaS is a bit like magic—minus the wand and rabbit. Here’s why it’s so popular: Save Time & Money – Developing software from scratch can feel like running a marathon in flip-flops. White label SaaS gets you up and running without blisters (or blown budgets). No Expertise Needed – Not everyone’s a software wizard, and that’s okay. Let the pros handle the coding while you handle the branding. Expand Your Product Offering – Want to offer e-commerce tools or CRM dashboards overnight? Done. White label SaaS lets you broaden your menu without breaking a sweat. Strengthen Brand Recognition – Since you’re adding your logo and colors, your customers see only your brand, not the software developer’s. Reliable Support & Updates – The original developers keep the software fresh, secure, and glitch-free. So, no late-night coding nightmares for you! Types of White Label SaaS Products The world of white label SaaS is diverse. Here’s a peek at some of the most popular types: How to Implement White Label SaaS Successfully Ready to dive in? Here’s a quick recipe for success: Common Challenges & Mistakes to Avoid Of course, white label SaaS isn’t all rainbows and unicorns. Keep an eye out for these pitfalls: Non-Optimized Pricing – Don’t just guess a price. Make sure it aligns with market demands and your business goals. Missing Metrics – Without robust analytics, it’s like driving blindfolded. Ensure the platform tracks churn, usage, and revenue. Over-Valued Products – Don’t get dazzled by shiny software that nobody wants. Validate that there’s real demand. Client Buy-in – Clients might be skeptical of new services. Use trials, case studies, and demos to show them the value. Real-World Success Stories 💡 LevelUp – Once just a payment app, it’s now used by restaurants like Sweetgreen and Pret A Manger to power loyalty programs under their own brands. 💡 Stream LXP – A white-label e-learning platform that’s fully customizable, making it easy for agencies to launch branded training portals. Conclusion & Final Takeaway So, what is white label SaaS? It’s your ticket to skipping software development headaches and jumping straight to delivering high-quality, branded solutions. From saving time and money to expanding your offerings and delighting clients, it’s a smart move for any growing agency. At the end of the day, it’s like having your cake and selling it too—only without the calories! Looking to unlock the power of white label SaaS?We’re a digital marketing company in Chandigarh that can help you navigate white-label SaaS and scale your services. Ready to expand your offerings and delight your clients? Let’s chat and bake up some success—together! 👉 Visit us at SE Rank Pro to learn how we, as a digital marketing company in Chandigarh, can elevate your SaaS game!
How to Edit Header in WordPress
When it comes to making a lasting first impression online, your website’s header is like your digital handshake—firm, confident, and memorable. Whether you’re aiming to boost user experience, enhance branding, or just want to flaunt that slick new logo, knowing how to edit header in WordPress is essential for your site’s success. Understanding the WordPress Header Before you jump into editing, let’s understand what we’re working with. A WordPress header typically houses your site’s logo, navigation menu, social icons, and sometimes even a catchy tagline. It’s that welcoming spot that greets your visitors and guides them through your digital world. In WordPress, headers can be edited differently depending on whether you’re using a block theme or a classic theme—but don’t worry, we’ll cover both! Editing Headers in Block Themes (Full Site Editing) Since WordPress introduced Full Site Editing (FSE), customizing your header has become easier than brewing your morning coffee. Here’s how to edit header in WordPress if you’re using a block theme: 1️⃣ Go to Appearance > Editor in your WordPress dashboard.2️⃣ Click on the Header template part to open it.3️⃣ Use the block editor (Gutenberg) to add, remove, or style blocks like your logo, navigation, and social icons.4️⃣ Style it up! Adjust colors, spacing, and alignment to match your brand’s personality.5️⃣ Hit Save and marvel at your shiny new header. Pro Tip: Experiment with block patterns to save time and add a professional touch! Editing Headers in Classic Themes If your theme is a bit more old-school, don’t worry. Here’s how to edit header in WordPress for classic themes: ✅ Use the Customizer: ✅ Using the Theme File Editor: Pro Tip: Create a child theme to preserve your edits when the theme gets updated. Because nothing says “oops” like losing hours of work in a single update. Adding Code Snippets to Your Header Sometimes, you might want to add Google Analytics, Facebook Pixel, or a third-party chat widget to your header. Instead of editing header.php directly (and risking a digital meltdown), use plugins like WP Code or Insert Headers and Footers. These handy tools let you insert custom code snippets safely and efficiently. Using Plugins for Header Customization Not a fan of coding? Plugins like Elementor Pro, JetMenu, and JetThemeCore are like your personal design assistants. They offer intuitive, drag-and-drop interfaces so you can visually customize your header—no sweat, no code. And let’s be honest, isn’t life too short for error messages? Creating Multiple Header Templates Here’s a fancy feature for those who like to show off: WordPress lets you create different headers for different pages. Want a minimal header for your blog and a jazzy one for your homepage? Done! In block themes: This lets you tailor your header for every section of your site, enhancing both branding and user experience. Common Pitfalls and Best Practices Let’s not forget the golden rules: ⚠️ Don’t overload your header with too many elements—it’s a header, not a theme park.⚠️ Keep your images lightweight to avoid slowing down your site.⚠️ Test on mobile and desktop—headers can look wonky if not responsive. Remember, search engines love headers that are clean and functional, so keep it simple and user-friendly. Conclusion Editing your WordPress header can feel daunting at first, but with the right approach (and a sprinkle of humor), it’s easier than ever. Whether you’re customizing through the Site Editor, using the Customizer, or adding a dash of code, you now know exactly how to edit header in WordPress. So go ahead—experiment, tweak, and make that header sing! By the way, if you’re looking for a helping hand, our team at digital marketing Company in Chandigarh specializes in making headers (and websites) truly shine. As a leading digital marketing Company in Chandigarh, we’re here to transform your site’s first impression into a lasting one. Let’s build something great together!
How to Update WordPress Manually
Keep Your Site Running Smoothly WordPress is a powerful platform, but it needs regular updates to stay secure and efficient. If you’ve been ignoring that “Please update now” message on your dashboard, it’s time to roll up your sleeves! Today, we’re going to break down how to update WordPress manually—a vital skill for any site owner who likes to keep things tidy and running like a well-oiled machine. After all, neglecting updates is like driving your car without changing the oil—eventually, things are going to get messy. Why Updating WordPress is So Important Updating WordPress isn’t just about getting the latest features (although who doesn’t love shiny new toys?). It’s about keeping your website secure, fast, and functional: ✅ Better security: Each update includes patches for vulnerabilities that hackers love to exploit. ✅ Improved performance: Updates often include speed boosts that keep your visitors happy (and Google’s algorithm too!). ✅ Enhanced compatibility: Avoid plugin conflicts and theme glitches that can break your site. ✅ New features: Unlock fresh functionalities that can help you scale your business. Think of updates as free performance and security enhancements—who doesn’t like free stuff? Preparation Before Updating Before you dive into the world of manual updates, let’s talk about some crucial pre-flight checks: 🔹 Backup everything – yes, everything! Your database, media files, themes, plugins, and your precious wp-config.php file. Tools like UpdraftPlus or Duplicator can handle this in a jiffy. 🔹 Read the update changelog – this lets you know what’s new and what might trip you up. 🔹 Check forums and community reviews – learn from others’ mistakes so you don’t have to make them yourself. 🔹 Deactivate caching plugins – they can interfere with the update process (like that one friend who always has “constructive feedback”). 🔹 Deactivate other plugins – plugin conflicts during updates can lead to “white screen of death” moments. Deactivate first, update later. 🔹 Update PHP version – because your site deserves to run on the latest and greatest! Let’s Do This: How to Update WordPress Manually Ready to take control? Here’s a step-by-step on how to update WordPress manually: 🔸 Step 1: Download the Latest WordPress VersionHead to WordPress.org and grab the newest zip file. Unzip it on your computer—consider this your new set of building blocks. 🔸 Step 2: Prepare the Update FilesDelete the wp-config-sample.php file and the wp-content folder from the new download—this prevents overwriting your themes, plugins, and precious memories (or at least your plugin settings!). 🔸 Step 3: Connect to Your Site via FTPUse an FTP client like FileZilla to connect to your hosting server. Navigate to the root directory (public_html or similar). 🔸 Step 4: Remove Old Core FoldersDelete the wp-admin and wp-includes folders from your site’s root directory.Pro Tip: Don’t delete wp-content—that’s where your themes and plugins live. 🔸 Step 5: Upload the New WordPress FilesUpload the fresh wp-admin and wp-includes folders from your local copy. Next, upload all other loose files from the WordPress download to overwrite your old ones. 🔸 Step 6: Update the Database (if needed)Visit yoursite.com/wp-admin/upgrade.php in your browser. Follow the prompts to ensure your database matches the new code. Post-Update To-Do List Once the update is complete, here’s how to make sure everything’s in top shape: ✅ Reactivate your plugins one at a time to avoid conflicts. ✅ Clear your cache – this isn’t the time for old versions to be hanging around like last year’s fashion. ✅ Check your site on both desktop and mobile—nothing beats a real-world test. ✅ Monitor for issues – if something’s off, check error logs and plugin compatibility. Troubleshooting the Update Of course, not everything always goes according to plan. If you’re seeing a “maintenance mode” message, just delete the .maintenance file via FTP to get your site back. Stuck on login screens? Clear your browser cookies and cache—those little crumbs can cause a lot of fuss. Still stuck? Restore your site using the backup you created. Remember: backups are like a time machine for your website. Pro Tips for the Future 💡 Use a child theme if you plan to customize—this way, theme updates won’t erase your genius design tweaks. 💡 Automate smart updates via your hosting control panel or plugins if you’re feeling brave (and want to save time!). 💡 Stay updated – check for updates regularly to keep your site secure and your visitors happy. Final Thoughts There you have it! Now you know exactly how to update WordPress manually. It’s not rocket science—it’s just good housekeeping. Regular updates keep your site fast, secure, and compatible with the latest themes and plugins. How We Can Help: Digital Marketing Company in Chandigarh If you’re juggling multiple digital tasks or don’t have the time (or patience) to update WordPress manually, we’re here for you! As a digital marketing company in Chandigarh, we specialize in not just content and SEO, but also in making sure your website stays up-to-date and secure. Our team of WordPress pros can handle all the technical updates, so you can focus on growing your business. Visit us at SE Rank Pro and see how we can help you stay ahead of the competition. Now that you know how to update WordPress manually, go ahead and take that well-deserved coffee break—or maybe even start drafting that next big blog post. After all, a well-updated site deserves an even better story to tell! 🚀
How to View Cached Pages

There’s a saying in the tech world: “Nothing on the internet ever truly disappears.” But try telling that to the millions who relied on Google’s cached pages—only to find that Google has officially pulled the plug. Yes, the once-reliable “Cached” button in Google Search is no more, leaving SEOs, researchers, journalists, and curious clickers wondering how to view cached pages now. Whether you’re trying to access a dead webpage, fact-check deleted content, or review a site’s historical layout, cached pages have long been a safety net. So, what now? Don’t worry—Google’s decision doesn’t leave us totally in the dark. Let’s break down what’s changed and, more importantly, how to view cached pages in 2025 using some clever alternatives. Why Cached Pages Still Matter in 2025 The digital landscape changes by the minute. Pages go down, URLs break, and entire websites vanish overnight like magician’s rabbits. Cached pages are your time-travel tickets, letting you peek into the past—even if the live site has changed, vanished, or been “mysteriously” deleted (looking at you, scandalous press releases). For SEOs, cached pages have been essential for checking if Google indexed the latest updates. For journalists, it’s how stories are verified. And for the rest of us, it’s often the last way to access that helpful article your friend swore existed but now returns a 404 error. Former Methods: Google Cache, We Barely Knew Ye Before its digital funeral, the Google cache feature worked like a charm. You’d simply click the tiny down-arrow next to a search result and select “Cached.” Alternatively, typing cache:example.com into Google’s search bar would deliver a stored version of the page. But as Danny Sullivan, Google’s Search Liaison, put it: “Yes, it’s been removed. I know, it’s sad. I’m sad too.” Apparently, Google believes the web has become reliable enough to drop the feature. Judging by how many government sites still crash during tax season, we beg to differ. So now that Google cache has exited stage left, let’s get into how to view cached pages today. 1. The Wayback Machine: Your Digital Time Machine The most robust option is the Wayback Machine, run by the nonprofit Internet Archive. It’s essentially a massive library of how the internet looked over the years. Here’s how to use it: Bonus: You can view multiple historical versions, seeing how a site evolved—or devolved—over time. It’s perfect if you ever want to relive that retro 2006 blog layout. Google even integrates Wayback Machine results in some search snippets, so if you see three vertical dots next to a result, click them—you might find a cached view there. 2. Bing’s Cache (Yes, Really) It might feel weird to say “Bing to the rescue,” but here we are. Unlike Google, Bing still offers a cached page view: It’s simple, fast, and a surprising win for Microsoft. Who knew Bing would be the cool uncle of search engines in 2025? 3. Use a Bookmarklet for Quick Access Feeling a bit nerdy? Create your own bookmarklet to access cached pages with a click. Here’s how: javascriptCopyEditjavascript:(function(){if(location.href.indexOf(‘http’)!=0){input=prompt(‘URL:’,’http://’);if(input!=null){location.href=’http://web.archive.org/web/*/’+input}}else{location.href=’http://web.archive.org/web/*/’+location.href;}})(); Now, just click the bookmark while visiting a site, and it’ll redirect you to the Wayback Machine’s cached copy. No magic spells required. 4. Browser Extensions Make It Even Easier Don’t want to mess with code? No problem. Extensions like “Web Archives” on Chrome and Edge provide a one-click way to view cached versions of any site. You can even choose which source to use: Bing, Archive.org, or others. These tools are especially helpful for SEOs monitoring how competitors update pages or for marketers tracking changes in content and layout over time. 5. Save It Yourself: DIY Caching If you’re always referring back to certain web pages, why not make your own mini cache? This won’t help you view changes over time, but it does offer peace of mind for important pages you reference often. SEO and Webmaster Tips Post-Google Cache If you’re wondering how to view cached pages for SEO audits or content verification, you now have to rely more on Google Search Console to check indexing status. Here’s what else you can do: While we’ve lost a helpful feature, there are now smarter tools and tactics available to achieve the same goal—sometimes with even more historical depth. Conclusion: Goodbye Google Cache, Hello Innovation While saying farewell to Google’s cache may feel like losing an old friend, it’s clear the future of viewing cached pages lies in smarter, decentralized tools. Whether you turn to Bing, the Wayback Machine, browser extensions, or a trusty bookmarklet, there are still plenty of ways to access the internet’s past. And when it comes to navigating the future of SEO, you don’t have to go it alone. At SE Rank Pro, a leading Digital Marketing Company in Chandigarh, we help businesses stay ahead of these changes. From indexing strategies to search visibility optimization, we keep your digital presence sharp—even when Google retires your favorite features. Let us help you keep your SEO efforts cached in success.
How to Unblock Sites
Smart, Safe & Simple Techniques for 2025 Let’s face it—there’s nothing quite as frustrating as being blocked from a website you really need. Whether you’re trying to watch your favorite YouTuber’s beach vlog or access a critical Google Doc, site restrictions can feel like digital handcuffs. But don’t worry—this blog on how to unblock sites is your key to online freedom (no hacksaws required). Whether you’re at school, the office, or even traveling in a country with strict censorship, this guide will walk you through safe and smart ways to access the content you need—without getting into hot water. Why Are Sites Blocked Anyway? Let’s start with the “why” before the “how.” Schools block sites to comply with laws like the Children’s Internet Protection Act (CIPA). Workplaces do it to prevent “cyberloafing” (a polite term for watching cat videos on company time). Governments? Well, let’s just say not everyone’s a fan of free speech. Sometimes, it’s even your own device or network settings playing gatekeeper. But don’t worry—we’ve got a fix for nearly every scenario. 1. VPNs: The Swiss Army Knife of Internet Freedom The most efficient method when it comes to how to unblock sites is using a VPN (Virtual Private Network). A VPN masks your IP address and routes your internet through servers in other locations—basically, it tricks the internet into thinking you’re somewhere else. Setting It Up: Pro Tip: If you’re on a shared computer (like at school), try browser-based VPN extensions instead of full software installs. 2. Proxy Servers & Browser Extensions: Lightweight and Handy Proxy servers work like VPNs—but only for a single tab or session. They’re perfect if you need a quick peek at a blocked site without installing anything permanent. Browser extensions are even easier. Add-ons like Hola or SetupVPN sit right in your Chrome or Firefox bar and are ready to spring into action whenever censorship strikes. Just remember: proxies are lighter on encryption, so don’t enter your credit card info unless you enjoy living dangerously. 3. Tor Browser: For the Privacy-Obsessed If VPNs are the highways of the internet, Tor is the underground tunnel. Tor bounces your internet traffic through multiple servers to completely anonymize your activity. Tor is perfect for people serious about privacy, but it’s slower than a snail on vacation. Still, it’s a powerful option for unblocking websites—especially in countries with strict surveillance. 4. DNS Tricks, Cached Pages, and Other Quick Fixes Sometimes, the simplest tricks work wonders. If you’re struggling with how to unblock sites, try these quick hacks: These tricks won’t always work, but they’re like internet duct tape—handy in a pinch. 5. Tweak Local Settings (If You Have Access) Sometimes, your device is the one being overly protective. On Windows: On Chrome: On mobile: Because sometimes, the only thing standing between you and a website is your mom’s parental controls from 2012. 6. Try a Private Browser with Built-In VPN Apps like AVG Secure Browser come with built-in privacy features like tracker blocking, encryption, and—most importantly—VPN access. This is a great all-in-one solution if you don’t want to juggle tools or configure settings manually. 7. Still Blocked? Try These Extra Workarounds Each of these is a creative way to approach how to unblock sites when all else fails. Is It Legal to Unblock Sites? Short answer: it depends. Just remember: “Just because you can doesn’t mean you should” is a phrase invented for situations like these. Conclusion: Unblock Responsibly Now that you know how to unblock sites, the key is using that power responsibly. VPNs are your best bet for all-in-one privacy and access. But quick tricks and proxies also have their place, especially if you’re on shared devices or can’t install software. Pick the method that works best for your situation, stay within the lines of legality, and remember—watching a cooking video in your 3 p.m. marketing meeting may not be worth the IT lecture. Need Professional Help with SEO or Web Accessibility? If your website is blocked, underperforming, or just not ranking as it should, we can help. As a leading digital marketing Company in Chandigarh, we specialize in SEO, web optimization, and user experience enhancements that ensure your online presence is never blocked—by algorithms or by humans.