How to Downgrade WordPress Version (Without Breaking Your Site)
WordPress updates usually promise more speed, better security, and that warm fuzzy feeling of “being up to date.” But every now and then, an update throws a wrench into the works—plugins start sulking, themes misbehave, and your site might just decide to play dead.
That’s when knowing how to downgrade WordPress version can be your secret weapon. In this guide, we’ll show you exactly how to do it—safely, effectively, and with a few laughs along the way.
Why Downgrade WordPress (Yes, It Happens)
You might be wondering, “Why would anyone want to go back in time when the future looks so shiny?”
Here are a few real-world reasons:
- Your favorite plugin or theme stopped working after the update.
- You’re using a plugin made in the era of dinosaurs and it hasn’t been updated since.
- Your current PHP version throws tantrums with the latest WP core.
- You just want to test something in a staging environment.
Important Reminder: Downgrading should always be temporary. Think of it like moving back in with your parents—useful, but not something you want to do forever.
Step 1: Prepare Like a Pro (Or Like a Paranoid Developer)
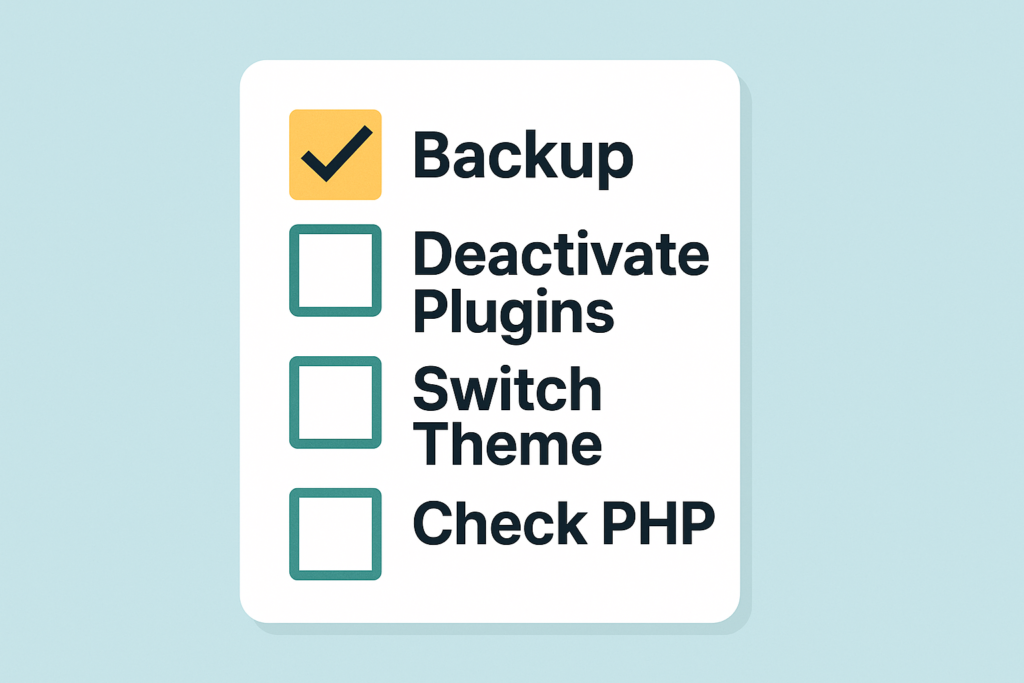
Before learning how to downgrade WordPress version, take a few safety measures:
- Back up your site: This is not optional. Use tools like BlogVault or UpdraftPlus.
- Switch to a default theme: Go for something like Twenty Twenty-Four.
- Deactivate all plugins: Conflicts are the enemy here.
- Check your PHP version: Older WordPress versions may not play well with newer PHP versions.
Step 2: Manual Downgrade via FTP (The Classic Way)
If you like the hands-on approach (or just love FileZilla), here’s how to downgrade manually:
- Visit the WordPress Release Archive and download your desired version.
- Unzip it and delete the
wp-contentfolder andwp-config.phpfile from it (you want to keep your content and settings intact). - Connect to your site using FTP.
- Delete the
wp-adminandwp-includesfolders from your server. - Upload everything from the old version—except the
wp-contentandwp-config.phpfiles. - Log in to your WordPress site, and if prompted, update the database.
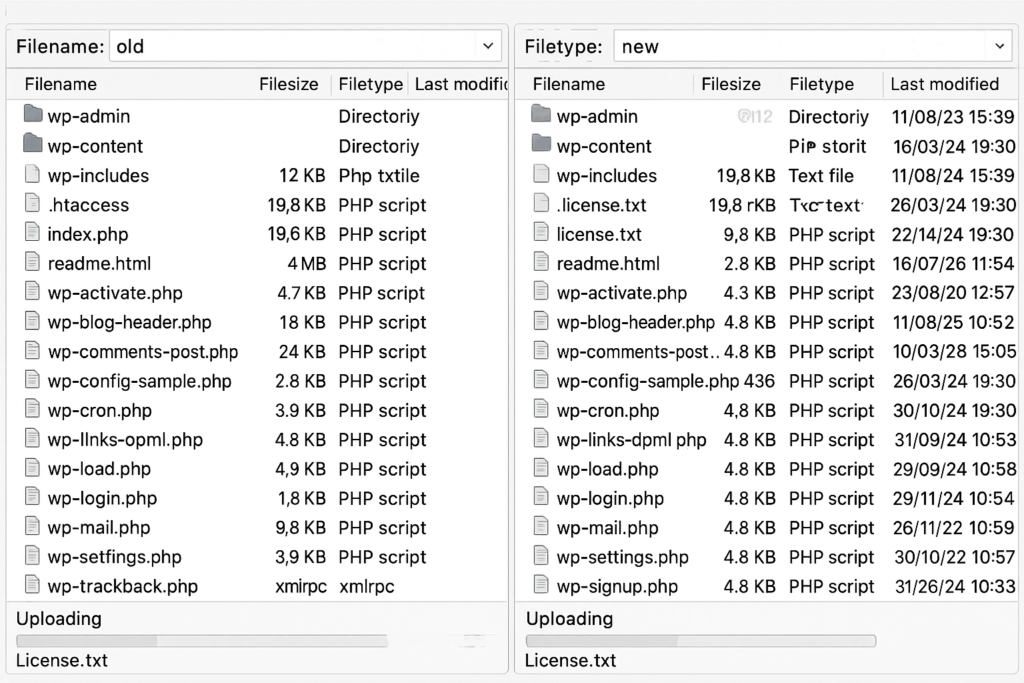
This method works like a charm, but please—no cowboy moves. Always test first on staging.
Step 3: Use a Plugin (The Safer Shortcut)
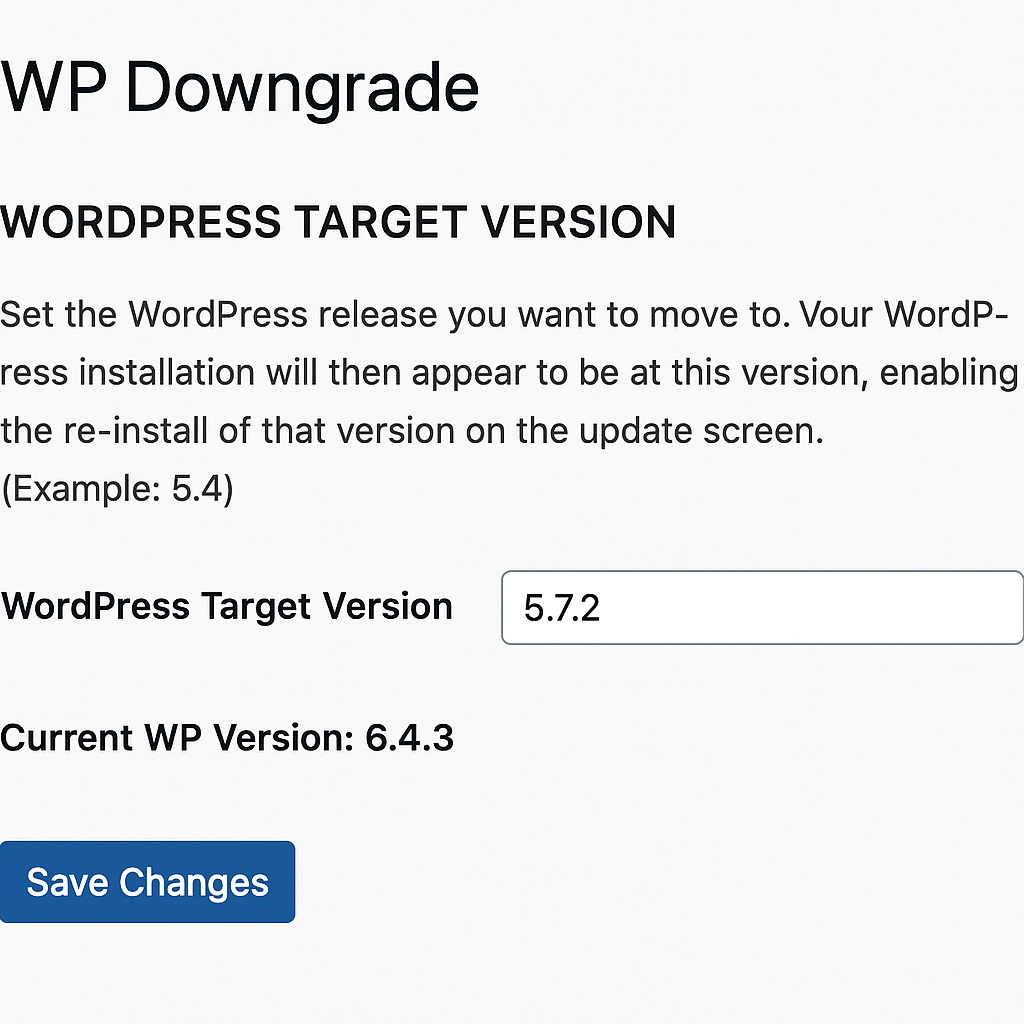
If FTP isn’t your style, let a plugin do the heavy lifting. Enter: WP Downgrade.
Here’s how:
- Install and activate the WP Downgrade plugin.
- Go to Settings → WP Downgrade.
- Enter the version you want (say, 6.2.2) and click Save.
- Head to Dashboard → Updates and click “Re-install.”
It’s like time travel but with fewer paradoxes.
Using plugins like these is the most user-friendly way to learn how to downgrade WordPress version without touching a single line of code.
Step 4: Restore From Backup (If You Have One)
This one’s simple:
- If you’ve been keeping regular backups, just restore one from a time before your WordPress updated.
- You can use Jetpack, Kinsta, or your hosting provider’s tools.
- Don’t forget to check for any recent posts or orders you might lose in the process.
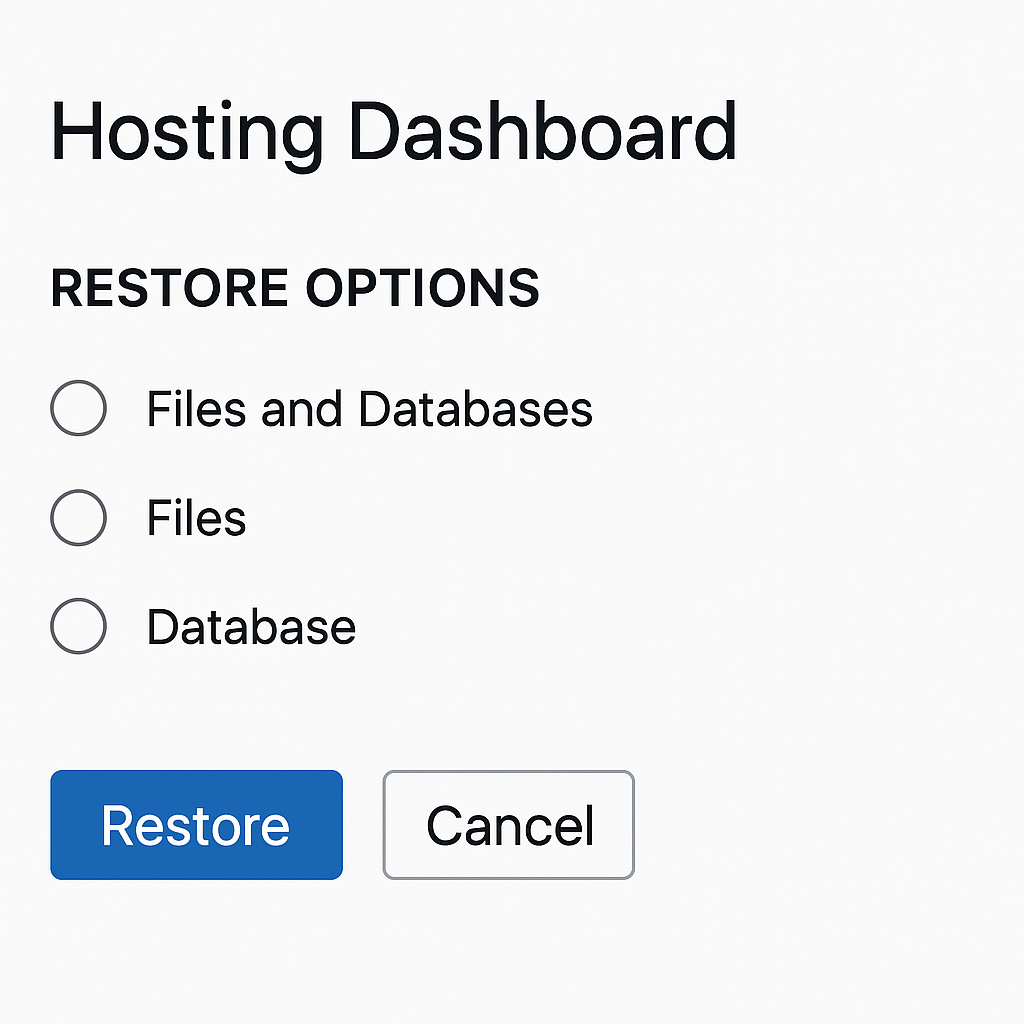
This is the equivalent of pressing “Undo” after things go sideways. Works well—assuming you remembered to hit “Save” in the first place.
Step 5: Roll Back a Plugin or Theme Instead
Sometimes, the core WordPress update isn’t the villain. It’s that shiny new plugin or a poorly tested theme update.
Solutions:
- Use WP Rollback to downgrade plugins/themes from the WP repository.
- Or manually upload older versions via FTP if you’re using a premium product.
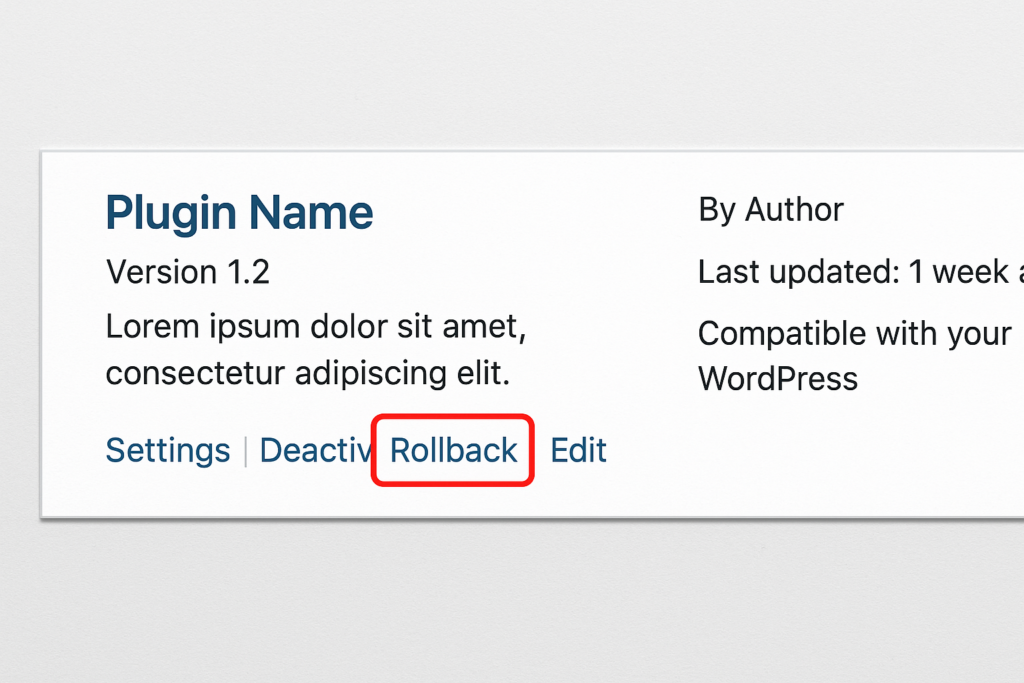
Trust us, figuring out how to downgrade WordPress version doesn’t always mean downgrading the whole site. Sometimes you just need to tame one misbehaving extension.
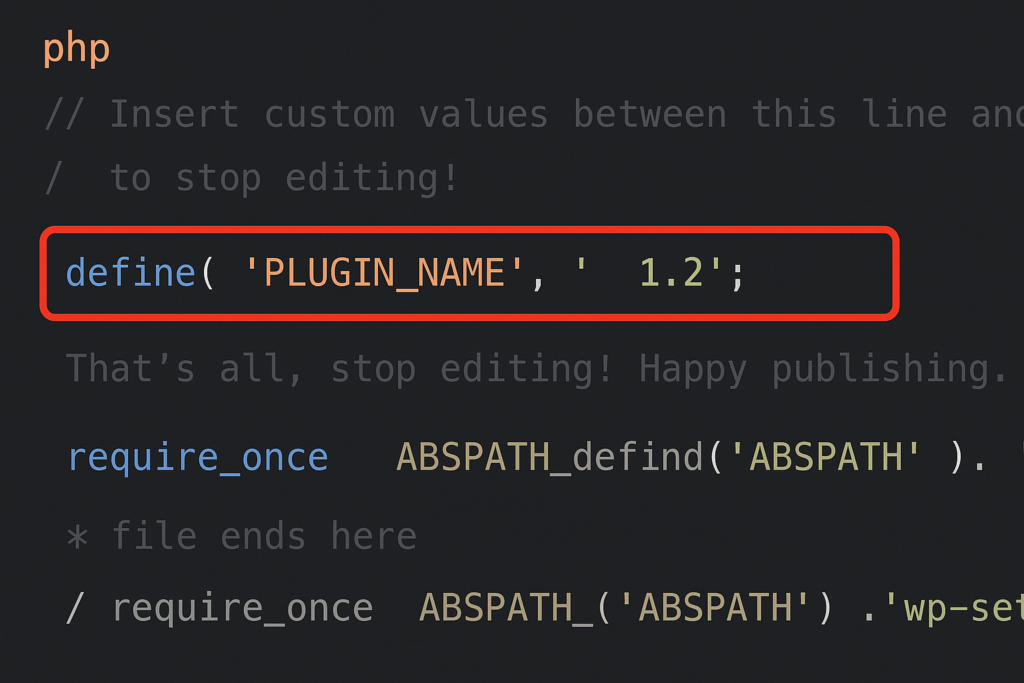
Step 6: Disable Automatic Updates (Temporarily!)
After a downgrade, WordPress may try to “help” by updating again. Politely tell it to stop—for now.
Edit your wp-config.php file and add:
define('AUTOMATIC_UPDATER_DISABLED', true); |
Just don’t forget to re-enable updates once you fix the underlying issue. (You don’t want to live in the past forever—unless you miss dial-up internet too.)
Final Checks: Don’t Skip These
- Visit your site and test all major pages.
- Reactivate your plugins one by one and check for issues.
- Clear your cache and CDN (just in case it’s showing a “ghost” site).
- Keep an eye on your security. Older versions = more vulnerabilities.
Wrapping It Up: Downgrade Smart, Not Forever
Learning how to downgrade WordPress version can save your website when things go wrong. But don’t make it a long-term solution.
Use it as a temporary fix:
- While you wait for a plugin or theme update
- To test in staging
- Or to restore an older backup version of your site
And always—always—plan to upgrade again when the issue is resolved.
Need Help with WordPress or SEO?
If all of this feels like juggling chainsaws in the dark, we get it. That’s where we come in.
As a trusted digital marketing company in Chandigarh, we help businesses like yours manage WordPress sites, SEO strategy, and everything in between—without panic attacks.
Need us to handle updates, backups, SEO audits, or plugin conflicts? Let’s talk. We’ll even bring the coffee.