How to Fix No Space After Bullet List in WordPress
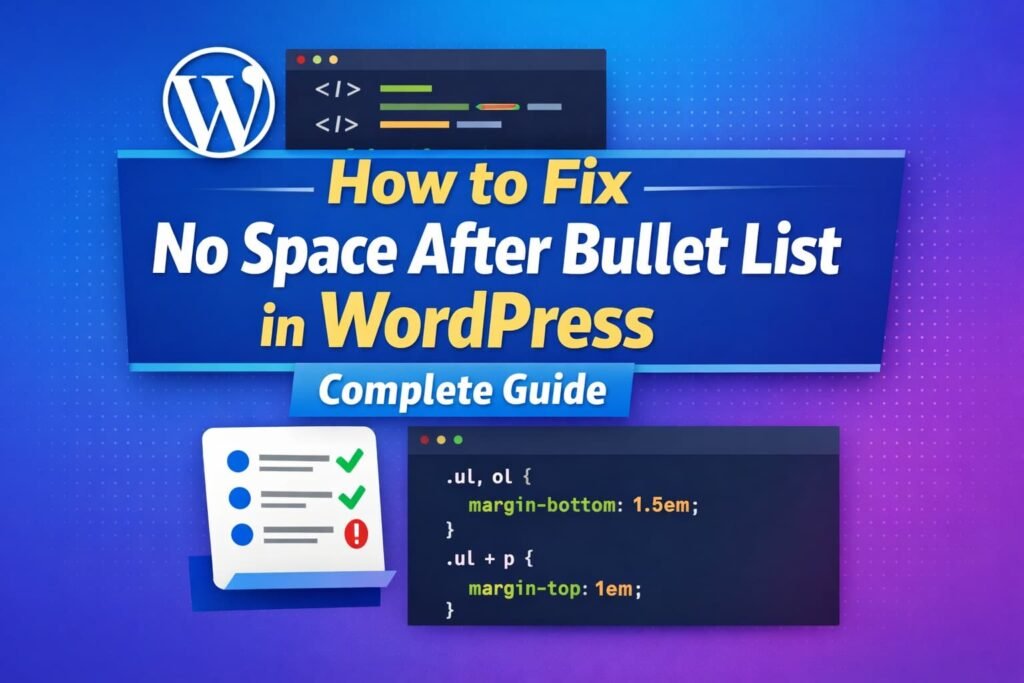
If your WordPress blog has no space between the last item in a bullet list and the paragraph that follows, you’re not alone. This is one of the most common formatting issues WordPress users face, especially when using modern lightweight themes. The problem usually appears after publishing content — everything looks fine in the editor, but on the frontend the paragraph sticks directly to the list. In this guide, you’ll learn: Let’s fix it properly. Why There Is No Space After a Bullet List in WordPress The issue is not caused by WordPress itself. It happens because most modern themes remove the default browser spacing between elements like <ul> and <p>. By default, browsers apply margin spacing automatically. But many performance-focused WordPress themes override it using CSS like this: When that happens, the paragraph that follows the list appears glued to it. This is especially common in themes like: It’s not a bug. It’s a styling decision. But from a readability perspective, it creates poor visual flow. How to Fix the Spacing Issue (Permanent Solution) The cleanest and most professional fix is adding custom CSS. Step 1: Go to WordPress Dashboard Appearance → Customize → Additional CSS Step 2: Add This Code Step 3: Publish and Clear Cache If you use a caching plugin, clear it. Then hard refresh your browser. That’s it. The spacing will now appear correctly across your entire site. Why This CSS Works The first rule restores bottom spacing to lists. The second rule ensures that when a paragraph directly follows a list, it has proper breathing room. The !important is used only if your theme aggressively overrides spacing. Gutenberg vs Classic Editor: Is There a Difference? Yes. Gutenberg (Block Editor) Lists are wrapped in a .wp-block-list class. That’s why the CSS includes it. If you do not target .wp-block-list, spacing may not change. Classic Editor Classic editor uses standard HTML markup without block classes. Targeting ul and ol is enough. Why This Matters for SEO This is more important than it looks. Poor spacing affects: Google measures engagement signals. If content feels cramped, users leave faster. Clean spacing improves: Better formatting = better user signals = stronger rankings over time. How Much Space Should You Use? For blog readability, ideal values are: These values improve scan-ability and make long-form content easier to consume. Alternative Fix (Not Recommended Long-Term) You could insert a Spacer block manually below every list in Gutenberg. But this: A global CSS fix is cleaner and more professional. Advanced Fix (If It Still Doesn’t Work) Some themes use very specific selectors like: In that case, use: If that still fails, inspect the element using browser developer tools and identify the exact selector overriding margin. How to Prevent Future Formatting Issues If you want to position yourself as a WordPress authority, remember this: Most formatting problems are caused by: The solution is almost always: Understanding CSS structure separates beginners from professionals. Frequently Asked Questions Is this a common WordPress issue? Yes. Many users search for: It is very common with lightweight themes. Will this affect mobile layout? No. The fix improves spacing on both desktop and mobile. Does this impact performance? No. Adding a few CSS lines has zero measurable performance impact. Final Thoughts The “no space after bullet list” issue is not a WordPress bug. It’s a theme styling decision. Fixing it correctly improves: Small formatting details create big perception differences. If you are building authority as a WordPress solution provider, solving these micro-problems and explaining the why behind them builds trust and credibility. WordPress is not about installing plugins. It’s about understanding how structure, styling, and user experience work together. And this issue is a perfect example.
How to Migrate a Website to a New Domain
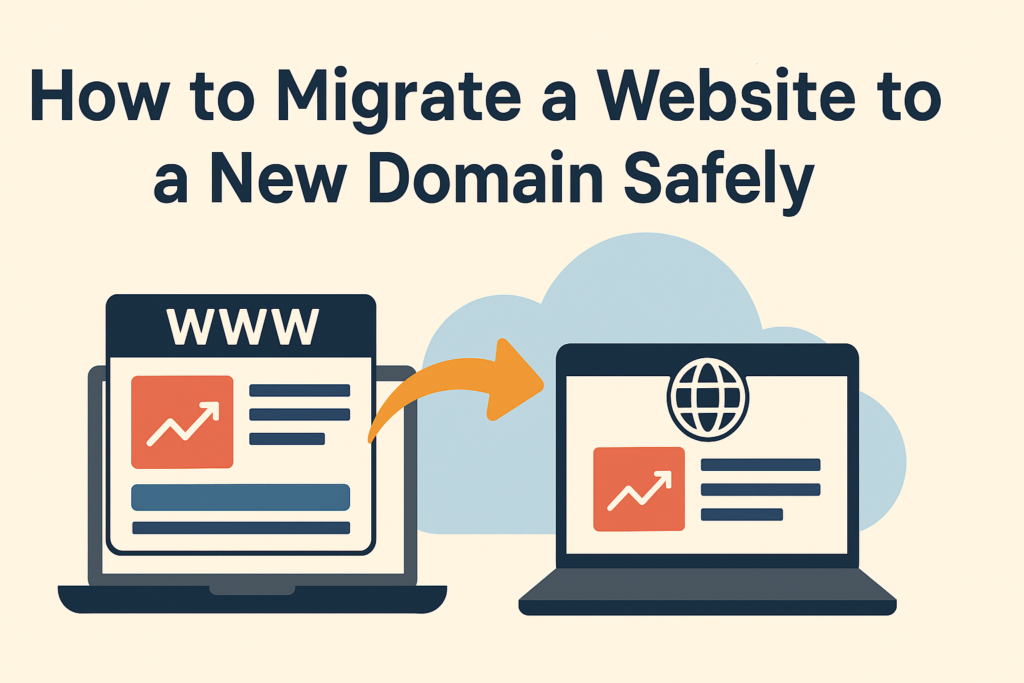
Rebrands happen. Businesses evolve. Sometimes that perfect domain reveals itself three years late. The trick isn’t if you should move—it’s how to migrate a website to a new domain without losing traffic, search equity, or your sanity. With a clear plan, solid backups, smart redirects, and a calm checklist, you can pull this off smoothly. Step 1: Plan like a project manager Before you touch a server, write a plan. Define your goals (brand clarity, international expansion, shorter URL), map owners for each task (dev, SEO, content), and schedule the move for a low-traffic window. Do a quick background check on your new domain using tools like historical snapshots and backlink audits to ensure it isn’t carrying spam baggage. This prep work is unglamorous—but it’s what makes the rest simple. Pro tip: If you change only the domain (not structure), your redirect plan is straightforward. If you’re also reorganizing URLs, plan a detailed redirect map before you migrate a website to a new domain. Yes, this is me nudging you to open a spreadsheet. Step 2: Back up everything (yes, everything) Create full backups of files and databases. You can do this manually via FTP + a DB export tool, use your host’s backup wizard, or rely on reputable plugins if you’re on WordPress (Duplicator, All-in-One WP Migration, UpdraftPlus). Save these backups in at least two locations. If anything goes sideways, you’ll thank Past You for the parachute. Step 3: Stand up the new domain safely Spin up the new environment and install an SSL certificate early so every test runs over HTTPS. If you’re building on staging, block indexing for now (robots.txt with Disallow: / or noindex headers) so the new site doesn’t compete with the old one in search. Import your database, upload your files, and update application configs (e.g., wp-config.php for WordPress) to point at the new database and domain. Step 4: Build a bulletproof redirect map This is where rankings live or die. For each old URL, specify its new home and implement 301 redirects. On Apache, use .htaccess; on NGINX, your server conf; on WordPress, a quality redirect plugin works—just avoid creating redirect chains (A → B → C). Always point A → C directly. If there’s no perfect new equivalent, send users to the closest relevant category page rather than the homepage to avoid soft-404s. Step 5: Update internal links and assets Once the redirects are in place, update internal links to the new URLs so users (and bots) don’t bounce through redirect hops. Refresh navigation, footer links, canonical tags, hreflang references, image src paths, CSS/JS references, and any hard-coded references to the old domain. It’s housekeeping—essential, invisible, and wildly impactful. Step 6: Refresh your technical SEO signals Generate a fresh XML sitemap of indexable URLs on the new domain. Remove staging paths and non-indexable pages. Submit the sitemap in Google Search Console (GSC) and Bing Webmaster Tools. In GSC, use the Change of Address tool so Google knows the move is permanent. Then unblock your robots.txt (or remove temporary noindex rules) so the new site can be crawled. Step 7: Verify, test, and fix Crawl the new site to catch broken links, missing assets, or redirect loops. Test top templates (home, category, product/service, blog, contact) and common user flows (search, forms, checkout). Watch server logs and GSC coverage reports for 404s and indexing issues. If you see unusual soft-404s or spikes in errors, adjust the redirect map and re-submit affected URLs. Step 8: Monitor rankings and traffic (expect a wobble) Even perfect migrations wobble briefly as search engines transfer signals. That’s normal. Track key rankings, impressions, clicks, crawl stats, and conversion metrics for both the old and new properties. In the first weeks: If you’re wondering how to migrate a website to a new domain and keep SEO stable, the answer is: don’t rush the indexing. Give it a little time, keep feeding search engines correct signals, and fix issues fast. Step 9: Update your ecosystem Tell the world. Update your Google Business Profile, social bios, email signatures, CRM templates, marketing automation links, paid ads, and major directory listings. Publish a short announcement post about the change and set expectations for users. When partners link to you, ask them to update backlinks to the new domain (this is free authority you don’t want to waste). Common pitfalls to avoid A quick recap (and a friendly nudge) If someone asks you how to migrate a website to a new domain the smart way, your cheat-sheet is: plan, back up, stage with noindex, implement 301s, update internal links, ship fresh sitemaps, use GSC Change of Address, monitor, and communicate. Do each step with care and you’ll keep your brand momentum—and your rankings. And yes, there’s room for humor. But not in your .htaccess. Save the jokes for the retro; keep your redirects clinical. Need a steady hand? If you’d like expert help with how to migrate a website to a new domain, we can handle the whole journey—from audit and planning to redirects, GSC setup, and post-launch monitoring. As a Digital Marketing Company in Chandigarh, we align the technical move with your SEO and growth goals so you don’t lose steam mid-flight. Ready to migrate with confidence? Talk to our team at your trusted Digital Marketing Company in Chandigarh today.
How to Embed a PDF in WordPress
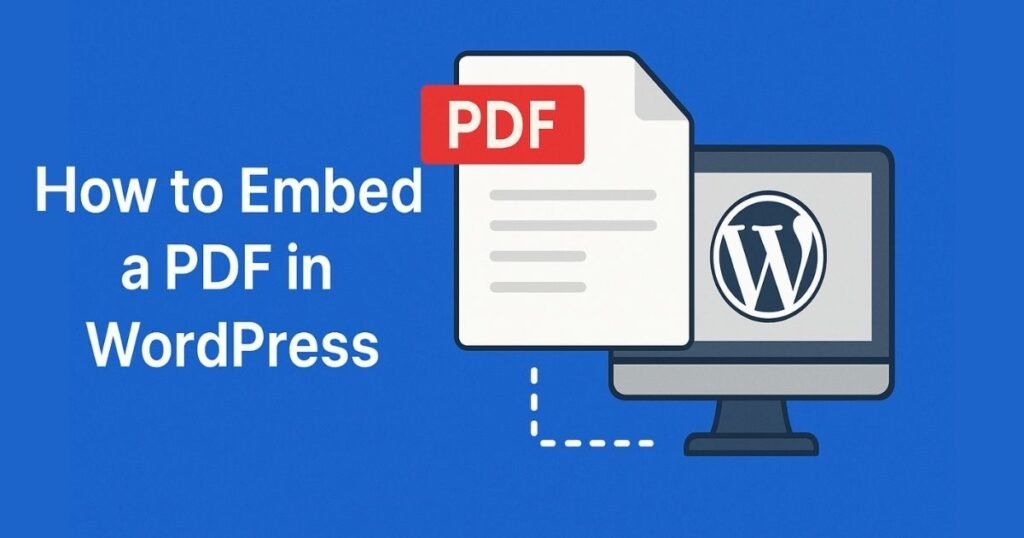
Quick Answer You can display PDFs on a WordPress page in three solid ways: (1) use the built-in File block in Gutenberg (fast and plugin-free), (2) paste an iframe (manual but flexible), or (3) install a dedicated PDF viewer plugin (best UX: zoom, search, full-screen, download toggle, analytics). If you want a simple, reliable path for how to embed a pdf in wordpress, start with the File block; if you need a polished, mobile-friendly viewer with navigation and tracking, use a plugin like PDF Embedder or EmbedPress. Why Embed PDFs At All? PDFs keep your layout intact across devices and are perfect for menus, catalogs, guides, whitepapers, and course material. Embedding them means visitors read on your page—no extra tabs, no lost attention. Better experience, better dwell time, happier users. (And no, tossing a lonely download link at the bottom of the page is not “strategy,” it’s a scavenger hunt.) Quick Prep (One Minute) Method A — Gutenberg File Block (Easiest, No Plugin) Pros: Built-in, quick, no dependencies.Cons: Limited controls (no fancy toolbar placement, TOC, or search).When to choose: You just need a clean, simple way for how to embed a pdf in wordpress without extra bells and whistles. Method B — Classic Editor / No-Plugin iFrame Prefer a manual approach? Use an iframe that points at your PDF (or Google’s viewer): <iframesrc=”https://docs.google.com/viewer?url=YOUR_PDF_URL&embedded=true”width=”800″height=”1200″frameborder=”0″allowfullscreen></iframe> Pros: Flexible size, still no plugin.Cons: Basic UX, dependent on third-party viewer, responsiveness can need CSS tweaks.When to choose: You’re comfortable with HTML and want a lightweight path for how to embed a pdf in wordpress. Method C — Best Plugin Options (Feature-Rich & Mobile-Ready) When you need search, thumbnails, continuous scrolling, full-screen, or analytics, use a viewer plugin: Recommendation: If you’re learning how to embed a pdf in wordpress for a content-heavy site (manuals, handbooks, long guides), start with PDF Embedder—it balances simplicity and control. Setup (example: PDF Embedder) Performance, Security & Accessibility Tracking Views & Downloads (Know What Works) Troubleshooting (Fast Fixes) SEO Tips for PDFs (Optional but Handy) Flipbook vs. Standard Viewer—When to Use Which Mini Checklist (Copy & Paste) Conclusion You’ve got three dependable routes for how to embed a pdf in wordpress: the File block for speed, an iframe for manual control, and plugins for a polished, mobile-friendly reader with analytics. Start simple, then scale up features as your library grows. Optimize files, keep accessibility in mind, and always measure engagement so your PDFs don’t just sit pretty—they actually perform. Need a hand? If you’d like us to set up the best method for your use case, optimize your PDFs, and wire up analytics, we can help—end-to-end. We’re a Digital Marketing Company in Chandigarh that builds content experiences that convert. From UX-friendly embeds to tracking and SEO, talk to us at Digital Marketing Company in Chandigarh and we’ll make your PDFs work as hard as your headlines.
How to Prepare for Black Friday Ecommerce
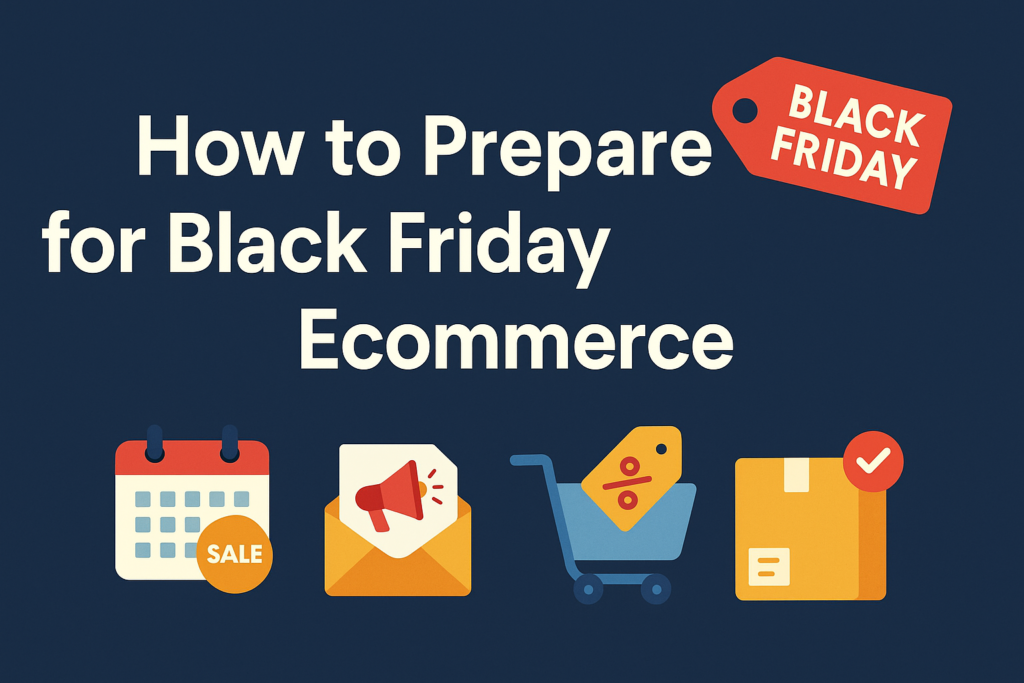
Black Friday isn’t a day anymore—it’s a season, a mindset, and for ecommerce brands, the Super Bowl of revenue. Traffic spikes, ad costs climb, inboxes overflow, and customers develop a sudden sixth sense for bargains. If you’ve been wondering how to prepare for Black Friday ecommerce in a way that scales profitably (and peacefully), this guide is your practical playbook. Start Early (Like… Yesterday) Half of shoppers start browsing deals weeks before Black Friday. That means your planning, testing, and list-building should start in October—or earlier. A/B test offers, creatives, landing pages, and discount thresholds. Review last year’s performance: which products converted, which channels pulled weight, and where carts fell apart. Knowing how to prepare for Black Friday ecommerce starts with data, not guesswork. Build Buzz Before the Big Weekend Treat November like a runway, not a deadline. Roll out “leaked” previews, countdowns, limited doorbusters, and early-bird lists for VIPs. Use social stories, Reels/TikToks, and micro-influencers to tease drops. Consider a “Why wait?” counter-narrative campaign that rewards early shoppers with smaller-but-smart incentives. (Yes, you can be anti-hype while still… hyping.) Segment Like a Pro (Email + SMS) Generic blasts won’t cut through the noise. Segment by behavior and value: Automate abandoned-cart and browse-abandon sequences. A clever subject line beats a bigger discount—though both together are a real power couple. Make Your Site Feel Effortless Your store must survive the surge and feel fast on mobile. Think: A reliable, one-click checkout can be the difference between “add to bag” and “add to competitor.” Be Strategic with Discounts (Not Just Generous) Yes, customers expect deals—but margin still matters. Instead of storewide deep cuts, try: If you’re deciding how to prepare for Black Friday ecommerce, remember: clarity converts. Make the discount visible on the product page, in the cart, and in your banner bar. Add a countdown to keep momentum. Use Psychology, Not Pressure Urgency and scarcity are powerful (when honest). Low-stock notifiers, timed doorbusters, and “ends tonight” banners all help. Sprinkle social proof—“Best seller,” “Others also bought,” “As seen in…”—to reduce hesitation. Cross-sell complementary items and upsell better versions with simple, friendly copy (“Add extras,” “Complete the set”). Automation Is Your Quiet Superpower You can’t clone yourself, but you can automate: A thoughtful workflow library is exactly how to prepare for Black Friday ecommerce without turning your office into a 24/7 command center. Payments, BNPL, and Trust Add multiple payment options and Buy Now, Pay Later for bigger baskets. Show security badges and make your returns policy obvious (and kind). January is “Return-uary,” so streamline portals, labels, and exchanges now. The smoother it feels, the more customers will risk an extra item in the cart. Shipping: Sell the Reality, Not the Fantasy Set clear shipping cutoffs, display delivery estimates, and use free-shipping thresholds to nudge AOV. If you expect volume, pre-stage inventory with your 3PL or fulfillment partner. Real-time tracking pages reduce “Where’s my order?” tickets and restore zen to your support team. Omnichannel & Post-Sale Momentum If you have stores, enable BOPIS/curbside and show local inventory. If you’re purely online, extend the experience with gift guides, printed inserts, and thoughtful packaging. After the dust settles, keep the relationship alive: thank-you emails, welcome series for first-time buyers, loyalty rewards, and “how to use/care for” content. How to prepare for Black Friday ecommerce also means preparing for the Tuesday after—turn one-time deal hunters into repeat fans. Measure What Matters Before the rush, turn on GA4 events, ad platform pixels, and server-side tracking where possible. Add heatmaps to your key pages. Define your “north star” metrics for the weekend (conversion rate, AOV, new vs. returning customers, opt-ins, CAC vs. ROAS). You can’t optimize what you’re not measuring—especially when traffic is at its seasonal peak. A Sample Timeline You Can Steal Final Word Mastering how to prepare for Black Friday ecommerce is less about blanket discounts and more about orchestration—smart offers, segmented messaging, silky mobile UX, and logistics that keep promises. Do that, and you’ll win the weekend and the months that follow. Need a seasoned partner to execute this, end-to-end? We can plan, build, and optimize your entire BFCM engine—strategy, creatives, funnels, automations, analytics, and post-sale retention. If you’re looking for a results-driven Digital Marketing Company in Chandigarh, we’re here to help. From growth strategy to hands-on campaign management, our Digital Marketing Company in Chandigarh turns Black Friday pressure into sustainable performance. Let’s make this your highest-converting season yet.
How to Start Reseller Hosting Business
Quick Answer If you’ve been wondering how to start reseller hosting business, here’s the simple version: you buy hosting resources wholesale from a provider, slice them into packages, brand them as your own, and sell them to clients. The provider manages the servers and uptime while you manage pricing, billing, and customer relationships. In short, you become the hosting company—without having to own a data center or wrestle with cooling fans at 2 AM. What is Reseller Hosting and How Does it Work? Reseller hosting is essentially the middleman model of the hosting industry. You buy server space, bandwidth, and resources from a major hosting company and then sell them to your clients under your own brand. From the client’s perspective, you are the hosting provider—they see your logo, pay your invoices, and call you for support. Behind the scenes, your hosting partner takes care of hardware, maintenance, and security updates. Think of it like running a restaurant with a professional chef hidden in the back kitchen—you handle the customers while someone else does the heavy lifting. Why Start a Reseller Hosting Business? There are plenty of benefits to jumping in: If you’ve ever wanted a business that combines flexibility, scalability, and credibility, reseller hosting checks all three boxes. Prerequisites Before You Begin Before you dive into how to start reseller hosting business, make sure you’re ready with the essentials: Step-by-Step: How to Start Reseller Hosting Business Step 1: Identify Goals and Audience Start by setting clear goals. Do you want to add recurring revenue as a web designer, or launch a full-fledged hosting brand? Define your target—whether freelancers, startups, or businesses looking for reliable hosting. Step 2: Choose a Reliable Hosting Provider Your hosting provider is your lifeline. Look for: Remember: if your provider is shaky, your reputation takes the hit. Step 3: Build Packages and Pricing Once you buy wholesale hosting, divide it into packages. For example: Price them competitively but profitably. Don’t undercut yourself—cheap hosting may attract clients, but it also attracts headaches. Step 4: Get Your Domain and Website Up Pick a short, memorable domain for your hosting brand. Then, build your website (WordPress is a solid choice). Use professional themes and essential plugins like Contact Form 7 for sign-ups and integrated payment gateways for billing. Your website should showcase your packages clearly and make sign-up smooth—no customer enjoys hunting for the checkout button. Step 5: Automate Billing and Onboarding Invest in tools like WHMCS or HostBill. These handle billing, invoicing, account provisioning, and renewals automatically. Automation ensures you spend less time chasing invoices and more time growing your client base. Step 6: Market Your Hosting Business This is where many resellers either shine or sink. Promote your services using: Remember, you’re not just selling hosting; you’re selling reliability, peace of mind, and your brand’s credibility. Extra Revenue Streams You Can Add Hosting alone is great, but bundling services makes you indispensable: This approach increases revenue and keeps clients locked into your ecosystem. Challenges to Expect (and Laugh Through) Like any business, reseller hosting has its hiccups: Yes, you’ll get the occasional 2 AM call from a panicked client whose website “looks funny.” But hey, that’s part of the hosting life! Future Trends in Reseller Hosting Keeping an eye on these trends ensures your reseller business isn’t stuck in 2025 while the world moves to 2030. Conclusion So, now you know how to start reseller hosting business: pick the right provider, create packages, automate billing, market like a pro, and prepare for growth. The best part? You don’t need millions in infrastructure—just determination, smart planning, and a bit of creativity. Every big hosting company started somewhere small—your reseller account could be the beginning of your hosting empire. Need Expert Help? At the end of the day, building and marketing a hosting business requires not just servers but a strategy. That’s where we come in. We are a Digital Marketing Company in Chandigarh that helps businesses like yours grow with SEO, web design, and digital campaigns that actually convert. If you want to launch your reseller hosting business with confidence, trust our Digital Marketing Company in Chandigarh to guide you every step of the way.
How to Add Google AdSense to WordPress
Introduction If you’ve ever wondered how bloggers earn money while you’re busy reading their latest article about “10 Ways to Brew the Perfect Coffee,” the answer often lies in Google AdSense. It’s one of the most reliable ways to monetize a WordPress site. Whether you’re running a personal blog, a news portal, or a small business site, knowing how to add Google AdSense to WordPress can help you turn clicks into cash without dealing with advertisers directly. The good news? It doesn’t require advanced coding knowledge. The better news? It can be set up in less time than it takes to binge an episode of your favorite Netflix show (well, almost). What is Google AdSense and How It Works Google AdSense is an advertising network that allows website owners to display contextual ads—text, image, video, or interactive—based on their content and audience. Advertisers pay Google, Google takes its cut, and you get your share. It’s a win-win system that runs on the CPC (cost-per-click) model, meaning you earn money every time a visitor clicks on an ad. The magic lies in its automation. Instead of negotiating with brands, you let Google’s massive database decide which ads are most relevant to your audience. This way, your visitors see ads that feel organic rather than out of place. Preparing Your WordPress Site for AdSense Approval Before you get too excited, Google isn’t handing out approval like candy. Here are a few things you need: A well-structured, content-rich site has better chances of quick approval. Step 1: Create and Set Up Your AdSense Account Start by heading over to the Google AdSense website and signing up. You’ll need to: Once submitted, your account will be under review. This may take anywhere from a few hours to a few weeks, so patience is part of the deal. (Consider it your first lesson in passive income—sometimes you have to wait.) Step 2: Connect AdSense to Your WordPress Site Option A: Using Site Kit by Google (Beginner-Friendly) This is the simplest route if you’re new. Option B: Manual Code Placement If you want more control: Option C: Advanced Plugins Plugins like Ad Inserter, Advanced Ads, or WPCode offer enhanced control, allowing you to display ads before/after posts, inside paragraphs, or even exclude them from specific pages. Step 3: Auto Ads vs. Manual Ads AdSense Best Practices for WordPress To get the best out of AdSense, follow these tips: Common Questions and Troubleshooting Conclusion Learning how to add Google AdSense to WordPress isn’t rocket science—it’s more like following a recipe. Start by creating an AdSense account, connect it to your WordPress site via Site Kit, manual code, or plugins, and choose between auto or manual ads. Follow best practices, keep your site valuable to readers, and let AdSense handle the rest. At the end of the day, remember: ads won’t turn your site into a money-printing machine overnight, but with consistency, good content, and optimization, they can definitely cover your next hosting bill (or that extra cup of coffee fueling your late-night writing). And if all this feels overwhelming, don’t worry—we’ve got you covered. We, as a Digital Marketing Company in Chandigarh, specialize in optimizing WordPress sites, boosting traffic, and maximizing ad revenue. So, if you’d rather focus on creating content while someone else handles the monetization puzzle, you know where to find us.
How to Cancel Elementor Subscription
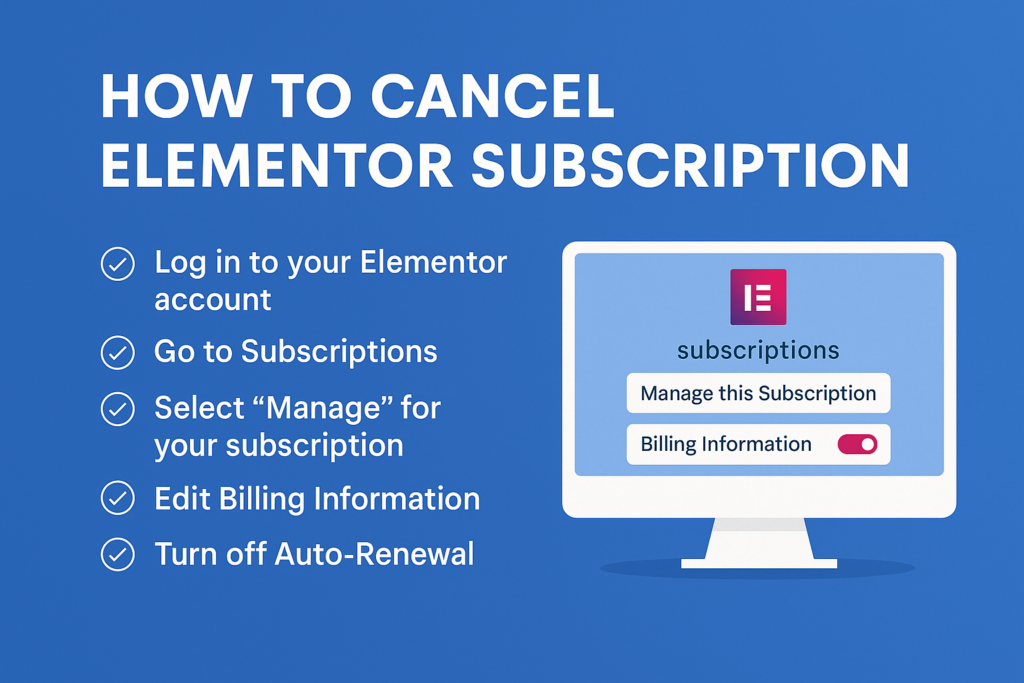
Quick Answer If you’re wondering How to Cancel Elementor Subscription, the process is simple: log in to your Elementor account → open Subscriptions → choose Manage → head to Billing Information → turn Auto-renewal off → confirm. That’s it. Note that canceling stops future auto-renewals; it doesn’t automatically issue a refund. For refunds (within 30 days in eligible cases), you must contact Elementor Support separately. Consider this less like a messy breakup and more like scheduling a graceful exit at the end of your billing cycle. Why people cancel (and why your site won’t explode) Maybe you’re trimming software costs, moving to a lighter stack, or relying more on Gutenberg and utility plugins. Whatever the reason, How to Cancel Elementor Subscription isn’t about breaking your site. Your existing designs stay intact. After your Pro plan expires, you’ll simply lose access to Pro widgets, templates, and premium support. Think of it as “view-only mode” for anything that used Pro features. Understand plans, renewals, and refunds (so there are no surprises) Step-by-Step Guide: Cancel Elementor Subscription (with zero guesswork) That’s the full set of steps behind How to Cancel Elementor Subscription—short, simple, and no scavenger hunt hidden buttons. What happens after you cancel auto-renewal Smart housekeeping before you cancel (optional but wise) Using add-ons? Cancel those separately If you’re running third-party ecosystems (e.g., The Plus Addons, Nexter Pro), you’ll cancel in their own dashboards—typically:Login → Dashboard → Manage Subscriptions → Cancel → Confirm.Their billing is independent of Elementor’s, so double-check each provider. If you get stuck, their support teams are usually quick to help (and surprisingly friendly—developers drink coffee, not tears). Key reminders (tape these to your monitor) Final Thoughts Learning How to Cancel Elementor Subscription is really about knowing where the renewal switch lives and what happens after you flip it. With a quick backup, a clear view of your renewal date, and a short checklist of pages using Pro widgets, you’ll move through the process without drama. If you’re switching to a leaner build, consider testing your new stack on a staging site first—future-proofing beats firefighting. Need help with the switch or a smarter rebuild? We can help you clean up, re-platform, or fully redesign—without losing SEO, conversions, or performance. We’re a Digital Marketing Company in Chandigarh focused on outcomes: faster sites, better UX, and content that actually converts. If you want a stress-free transition (and a results-first plan), reach out—Digital Marketing Company in Chandigarh that treats your website like a revenue engine, not a roulette table.
How to Delete a WordPress Blog
Sometimes, a blog is like that gym membership you were super excited about in January—until March rolled around and, well, let’s just say the treadmill got more dust than you. Similarly, not all websites are meant to last forever. If you’ve been wondering how to delete a WordPress blog, you’re not alone. Whether your blog was just a temporary project, or you’ve decided to start fresh elsewhere, WordPress gives you the option to completely remove your site. In this blog, we’ll go step by step through the process of deleting a WordPress blog—both self-hosted and WordPress.com versions—while sharing a few smart precautions (and maybe a dash of professional humor to lighten the mood). Before You Hit “Delete”: A Few Smart Moves Deleting a blog is like packing up your apartment before moving out: you don’t want to toss out your favorite mug by accident. Here’s what to do first: Think of it as putting your stuff in storage rather than tossing it straight into the dumpster. Deleting a Self-Hosted WordPress.org Blog If your blog runs on your own hosting plan (like Bluehost, SiteGround, or HostGator), the process is pretty straightforward. Step 1: Backup your site. Use FTP software like FileZilla or a plugin like UpdraftPlus. Step 2: Delete site files. Log into your hosting account’s cPanel, go to the File Manager, and open the public_html directory. This is the root folder that holds your WordPress files. Select and delete everything inside. Step 3: Remove the database. For a complete cleanup, head to MySQL Databases in cPanel and delete the database and its users. Step 4: Cancel hosting/domain. If you don’t plan to reuse the hosting or domain, cancel your subscription to avoid surprise renewals. 👉 Pro Tip: If your host uses Softaculous, there’s an easier way. Just log in, find your WordPress installation, hit the big red “X,” check all boxes (Remove Directory, Remove Database, Remove Database User), and click “Remove Installation.” Boom—blog deleted faster than a bad tweet. Deleting a WordPress.com Blog If your blog is on WordPress.com (the free or paid hosted version), the steps are a bit different. Step 1: Backup your site. Go to Tools → Export and download “All Content.” Don’t forget to save your media manually. Step 2: Go to Settings → Delete Site. You’ll be asked to confirm that you’ve backed up your content. Step 3: Confirm the deletion. Check the box, click Delete Now, and watch for an email from WordPress. You’ll need to click the verification link before your site is permanently removed. Step 4: What if you bought a custom domain through WordPress.com? In that case, you can’t delete the blog until you transfer the domain. Options include: In other words, if you’ve tied your blog to a custom domain, WordPress makes sure you don’t accidentally delete the whole thing before you know what you’re doing. What Happens After You Delete Your Blog? Here’s the part most people don’t think about: deleting a blog doesn’t mean it vanishes from the internet instantly. So while the blog itself will be gone, digital traces may linger temporarily. Think of it as your blog’s “ghost” floating around the internet until the cache catches up. Should You Really Delete It? It’s worth asking yourself one last time. Do you want to erase it forever, or would making it private serve the purpose? If your blog holds sentimental value (or SEO value), you might regret the permanent wipe later. But if you’re sure this chapter of your digital life is over, then following the steps above is the safest way to do it. Whether you’re on WordPress.com or self-hosted WordPress.org, now you know exactly how to delete a WordPress blog properly. Final Thoughts Deleting a WordPress blog may sound intimidating, but once you’ve backed up your content and double-checked your decision, it’s a pretty straightforward process. For self-hosted sites, it’s all about clearing out files and databases. For WordPress.com blogs, it’s about exporting content and confirming deletion via email. At the end of the day, websites—just like hobbies—come and go. Maybe you’re decluttering your digital space, maybe you’re rebranding, or maybe you just don’t want to keep paying hosting bills for a site you no longer love. Whatever the case, knowing how to delete a WordPress blog empowers you to take control of your online presence. And if you’re not deleting but instead looking to grow, optimize, or redesign your website, that’s where we come in. As a trusted Digital Marketing Company in Chandigarh, we help businesses create, manage, and scale their online presence with smart strategies that actually work. From SEO to WordPress support, we make sure your website isn’t just alive—it’s thriving.
What is a Lightbox in WordPress?
The internet is a busy place. With over a billion websites out there, every page is fighting for your attention like salespeople at a street market. And just when you manage to get visitors to land on your website, the challenge begins: how do you keep them focused on your content instead of letting their eyes wander? Enter the hero of the story: the WordPress lightbox. Think of it as a spotlight at a theater — when it turns on, the noise around fades, and all eyes are drawn to the star of the show. But before you rush off to install one, let’s break down exactly what is a lightbox in WordPress, how it works, why you might need it, and how to add it to your own site. What is a Lightbox in WordPress? To put it simply, a lightbox is a popup overlay that highlights media content — like images, videos, or even forms — while dimming the rest of the page behind it. Imagine you’re in a gallery: when the lights dim and a painting is lit with a single spotlight, your focus instantly goes to it. A lightbox works in the same way online. This is different from a standard popup. While traditional popups can feel like that uninvited guest at a party who keeps interrupting your conversation, lightboxes are the polite friend who gently clears their throat to say, “Hey, I’ve got something important to show you.” When people ask what is a lightbox in WordPress, the best answer is: it’s a tool to showcase important content without forcing users to leave the page or deal with unnecessary distractions. How Does a Lightbox Work? Lightboxes use scripts like JavaScript, jQuery, or CSS3 to open a modal window whenever a user clicks on an image, button, or link. The background fades, and the chosen content comes into focus. Key features: Think of it as opening a window without ever leaving your room — you get fresh air, but you stay where you are. Why Use a Lightbox in WordPress? Now that you know what is a lightbox in WordPress, the bigger question is: why bother adding one? Here’s why: It’s like having your website wear a tailored suit instead of baggy sweatpants. Both cover the basics, but one certainly makes a stronger impression. Where Can You Use a Lightbox? The versatility of lightboxes is what makes them a favorite among website owners. You can use them in: If you’re showcasing work online, a lightbox is like turning your “online portfolio” into an interactive art gallery. How to Add a Lightbox in WordPress You have two main approaches: 1. Use a Plugin (Easiest Way) Plugins are the go-to choice for most WordPress users because they save time and avoid messy code. Here are some reliable options: 2. Manual Coding (For Developers) If you’re a coding pro, you can build your own lightbox using jQuery, JavaScript, and CSS. The advantage? Full control, fewer plugin updates, and leaner performance. The downside? It takes time, and if something breaks, you’re on your own. For most people, sticking with plugins is like calling a cab instead of learning to build a car. Both will get you where you need to go, but one is significantly less stressful. Customizing Your Lightbox Once you’ve installed your lightbox, the fun begins. Most plugins allow you to: This way, you can make your lightbox reflect your brand’s personality instead of looking like a generic pop-up. Best Practices for Using Lightboxes Like coffee, lightboxes are best in moderation. A little keeps your visitors awake and engaged, but too much will have them clicking away. Here are some tips: Conclusion So, what is a lightbox in WordPress? It’s one of the simplest yet most effective ways to make your content stand out. Whether you’re a photographer showcasing stunning images, an online store owner highlighting products, or a blogger trying to grab more email subscribers, lightboxes can give your site that professional polish. Just remember: use them wisely. Overdo it, and your visitors will feel like they’re being bombarded at a carnival. But use them strategically, and you’ll guide them smoothly toward what matters most. At the end of the day, the right tools make all the difference — and if you’re looking to combine design, SEO, and overall digital strategy, we’ve got your back. Our Digital Marketing Company in Chandigarh specializes in helping businesses like yours shine online with smart solutions, from lightbox optimization to complete SEO campaigns. Because after all, what’s the point of putting your content in the spotlight if no one’s in the audience?
How Can I Start SEO Business
The world is searching—literally. Every second, over 63,000 Google searches are made. Behind each one is a person looking for an answer, a product, or a service. Businesses know this, which is why SEO has become one of the most sought-after digital marketing services worldwide. If you’ve ever asked yourself “how can I start SEO business”, you’re in the right place. The idea may sound daunting at first—full of algorithms, rankings, and jargon—but the truth is starting an SEO agency is more about business acumen, smart positioning, and persistence than memorizing every Google update. And yes, there’s even room for some humor along the way (though Google still won’t rank your jokes). So let’s break down how you can turn your SEO knowledge—or even curiosity—into a profitable business. Step 1: Understand the SEO Landscape SEO isn’t magic, and Google isn’t a genie granting three keyword wishes. Search engines crawl, index, and rank websites based on how helpful, relevant, and trustworthy they appear. The role of an SEO business is simple: help websites appear where potential customers can actually find them. That means knowing the basics—technical SEO, keyword research, content strategy, and link building. Don’t worry—you don’t need to be a full-blown “SEO wizard.” Clients hire you because they aren’t experts. Your job is to deliver results, not to give a TED Talk on crawl budgets. Step 2: Choose Your Niche (Don’t Be a Generalist) If you try to be an SEO agency for everyone, you’ll quickly realize you’re competing with tens of thousands of established agencies. That’s like opening a coffee shop across the street from Starbucks and hoping your smile alone beats their lattes. Instead, find a niche: When you specialize, you instantly reduce competition and build authority. For example, a lawyer will always prefer an “SEO for law firms” expert over a generalist. Remember: focus creates wealth, while being a jack-of-all-trades creates headaches. Step 3: Decide Which Services You’ll Offer “Doing SEO” can mean a hundred different things. When thinking how can I start SEO business, clarify which services you’ll provide: You may later add PPC or social media management, but don’t overstretch too early. And here’s a pro tip: outsourcing with White Label SEO is a lifesaver. Why? Because you don’t need to hire a giant team. Instead, you can partner with agencies who handle link building, content, or technical tasks while you manage strategy and clients. It’s like having a secret army of SEO ninjas without paying their health insurance. Step 4: Build Your Own Online Presence Clients won’t trust your SEO skills if your own website looks like it was designed in 2008 and hasn’t ranked since. Build a modern, optimized site for your agency. Publish regular blogs, show case studies, and demonstrate your knowledge. Don’t aim for “SEO agency” as a keyword—it’s dominated by global giants. Instead, rank for niche and local terms, like “SEO for dentists in Austin” or “local SEO for real estate agents.” That’s where you can win. Also, use social media wisely. Even if you don’t offer social media marketing, having a professional presence on LinkedIn or Twitter adds credibility. Step 5: Perfect Your Pricing & Packages SEO works best long-term, so retainers are your best friend. You might start with packages like: Make sure your prices reflect the effort required. Going too cheap might fill your calendar, but it will also empty your sanity. And remember: it’s easier to keep three good-paying clients than ten bargain hunters who expect miracles. Step 6: Build a Portfolio (Even If You Don’t Have Clients Yet) No portfolio? No problem—at least initially. You can: Case studies, testimonials, and before/after snapshots of traffic growth will become your strongest selling tools. Step 7: Attract Your First Clients The million-dollar question in how can I start SEO business is: where do I find clients? The answer lies in three areas: Offering free audits or trials works well. Just make sure you don’t give away the whole toolbox—show value but leave them curious for more. Step 8: Close Deals & Set Expectations This is where you prove you’re not just another “SEO guy.” Personalize proposals, keep them clear, and never promise page-one rankings in a week (unless you also own Google). Be upfront: SEO is a long game. Clients appreciate honesty more than unrealistic guarantees. Introduce them to their account manager, outline your process, and communicate consistently. Step 9: Retain Clients (The Real Secret to Growth) Client retention is cheaper than client acquisition. Focus on: A happy client not only stays but also sends referrals your way. Step 10: Scale Smartly Once you’ve got a system, scale through: Remember: growth isn’t about doing everything yourself. It’s about building processes, systems, and partnerships. Final Thoughts Starting an SEO agency isn’t about knowing every algorithm update—it’s about persistence, positioning, and building trust. The question “how can I start SEO business” can feel overwhelming, but the roadmap is clear: choose a niche, define your services, build your presence, attract clients, and scale with smart systems (and outsourcing when needed). And if you’d rather skip the trial-and-error phase? That’s where we come in. As a trusted Digital Marketing Company in Chandigarh, we help businesses master SEO, content, and digital strategy with expertise and a proven approach. Because while you focus on your business, we make sure people can actually find it online.