The first time I tried to build a WordPress page, I spent 2 hours wrestling with blocks, formats, and a mysterious sidebar that kept disappearing. It felt like trying to assemble IKEA furniture with no manual. Then I discovered Elementor—and suddenly, creating web pages didn’t feel like a nightmare.
If you’ve ever asked yourself how to create a page with Elementor, you’re not alone. This drag-and-drop page builder is a game-changer for beginners and pros alike. No coding, no frustration—just your vision and a few clicks.
In this blog, we’ll walk you through everything from installation to publishing a fully functional and good-looking WordPress page using Elementor.
What Is Elementor and Why Is Everyone Talking About It?
Elementor is a leading WordPress page builder plugin with over 5 million active installations. Its intuitive interface lets you design mobile-responsive pages in real-time—without touching a single line of code.
You can choose between Elementor Free (which is surprisingly powerful) and Elementor Pro, which unlocks advanced features like Theme Builder, WooCommerce integration, and marketing widgets.
Whether you’re building a personal blog, a landing page, or an eCommerce site, Elementor gives you complete control over layout and styling—without needing a developer or, worse, calling your cousin who “once built a site in college.”
Before You Begin: What You’ll Need
Before diving into how to create a page with Elementor, make sure you have:
- A live WordPress site
- Elementor installed and activated (free or Pro)
- A cup of coffee and a pinch of creativity
We also recommend choosing the “Elementor Canvas” template for a blank slate (no header, no footer, no distractions—just you and your masterpiece).
Step-by-Step: How to Create a Page with Elementor
Step 1: Create a New Page
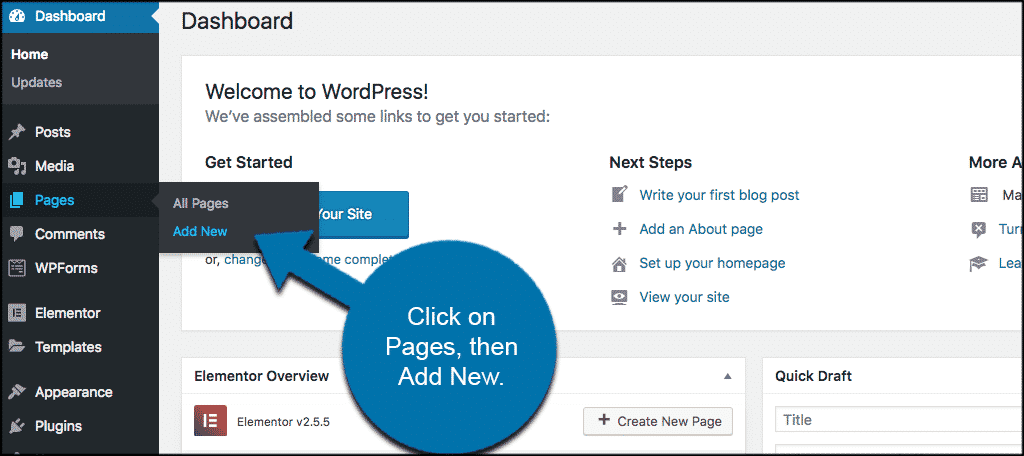
Log in to your WordPress dashboard. Go to Pages > Add New. Title your page (e.g., “Home” or “My Awesome Page”), and from the Page Attributes section, choose Elementor Canvas for a distraction-free layout.
Step 2: Click ‘Edit with Elementor’
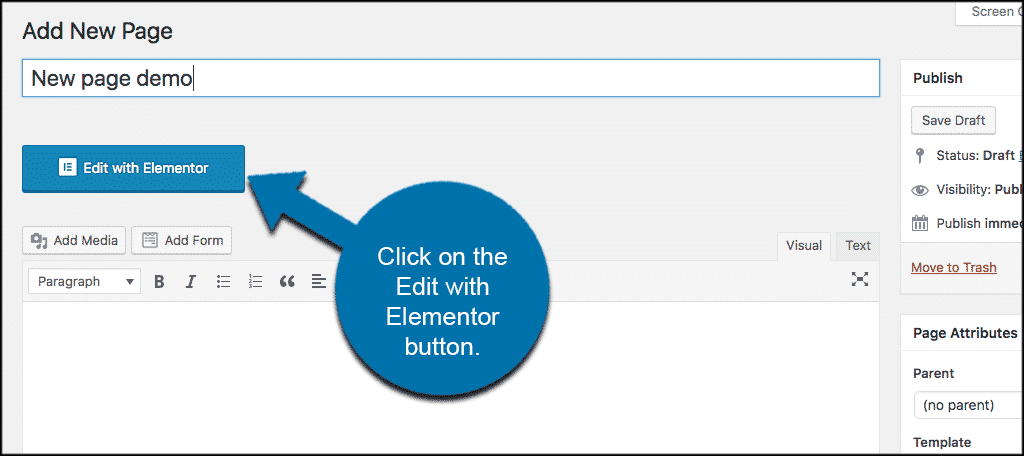
This button takes you into Elementor’s visual builder. You’ll now see a two-panel layout: the widget sidebar on the left, and your live preview canvas on the right. No preview-tab juggling needed—what you see is literally what you get.
Step 3: Add a Section and Choose a Structure

Click the “+” icon in the main canvas to add a new section. Choose your desired column structure—single, double, or more. Think of these as the backbone of your layout.
Step 4: Drag, Drop, and Customize
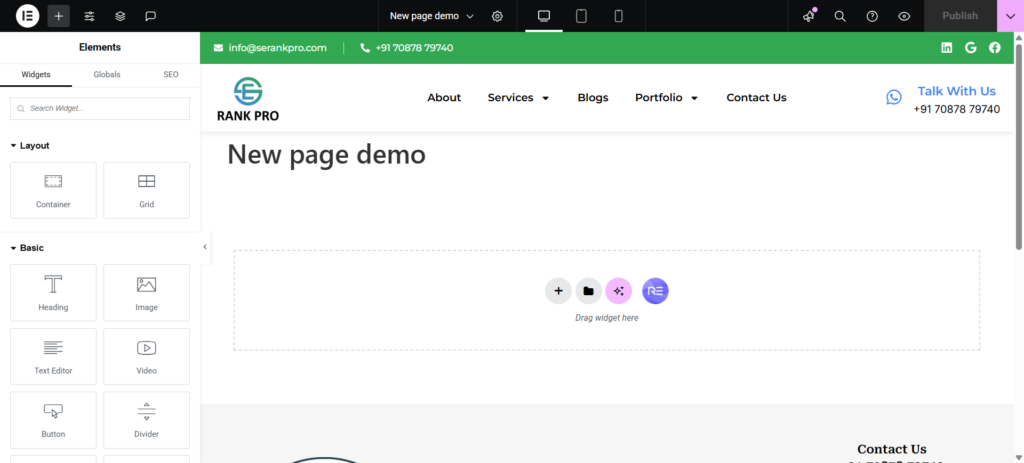
Now the fun begins. Drag widgets (like Heading, Image, Button, or Video) from the left sidebar into your section. Each widget can be styled using the Style and Advanced tabs.
Want a full-width hero image with text and a call-to-action button? No problem. Want a two-column layout with an image on the left and text on the right? Easy.
And yes, Elementor also has ready-made templates and blocks if you’d rather skip the design and jump straight to customization. (Hey, no shame in letting the experts handle the heavy lifting.)
Step 5: Make It Mobile-Friendly
Elementor lets you preview and edit your design for desktop, tablet, and mobile. Just click the responsive icon and fine-tune your layout for every device. Because that brilliant desktop layout may not look so hot on a smartphone.
Step 6: Save or Publish
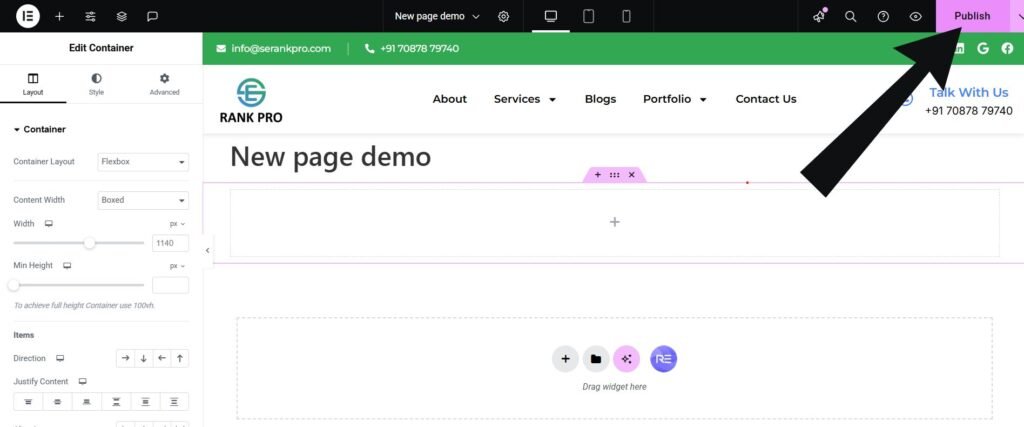
Done designing? Click Publish. Need a break? Hit Save Draft. Need to undo a styling crime you committed five minutes ago? Use the Revision History feature to roll it back like nothing ever happened. (We’ve all been there.)
Pro Tips That Will Make You Look Like a Designer
- Use Global Widgets: Save your custom-made buttons or headers and reuse them across pages. Change it once, update everywhere.
- Navigator View: Helps you locate overlapping or buried widgets when your page gets complex.
- Keyboard Shortcuts: Elementor has built-in hotkeys (Cmd/Ctrl + ?) to speed things up. Trust us, your wrist will thank you.
- Duplicate Sections: If it works once, it’ll probably work again. Why rebuild what you can just duplicate?
Mistakes to Avoid (Learn from Our Embarrassment)
- Not setting the template to Elementor Canvas before designing (You’ll thank us later).
- Forgetting to test on mobile. Just because it looks great on a 27” monitor doesn’t mean your visitors on iPhones will agree.
- Going overboard with widgets. Remember, simplicity sells—not a page filled with flashing testimonials and 14 animations.
Also, don’t rely solely on auto-save. Elementor is amazing, but even it can’t save you from accidental browser closures. Click “Save” often. Like, really often.
Elementor Pro: Is It Worth It?
If you’re building just one or two pages, the free version is more than enough. But if you want WooCommerce integration, theme building, popups, or a slick form builder, Elementor Pro pays for itself quickly—especially if you’re managing multiple sites.
Freelancers, agencies, and eCommerce entrepreneurs especially benefit from the additional widgets, templates, and support.
Conclusion: From Confusion to Creation
We hope this guide answered your question: how to create a page with Elementor. The journey from blank canvas to beautiful web page doesn’t require a degree in design—or even a background in tech.
With Elementor, you’re not just building pages—you’re creating experiences.
Need Help? We’ve Got You Covered
If you’re looking to level up your website or need custom Elementor pages built for your brand, our Digital Marketing Company in Chandigarh is here to help. From SEO to full-fledged web development, we build digital strategies that work.
Ready to turn clicks into customers? Visit SE Rank Pro – the trusted digital marketing company in Chandigarh powering local and global brands alike.